Perfect Ramen Eggs Ajitama Your Go-To Recipe
Ramen Eggs, also known as Ajitama, are the undeniable jewels of any ramen bowl, aren’t they? There’s something utterly magical about that perfectly jammy yolk, infused with a savory, umami-rich marinade. It’s the element that elevates a simple noodle soup into a truly soul-satisfying experience. I’ve personally spent countless hours perfecting my Ramen Egg recipe because, let’s be honest, a good Ajitama is worth its weight in gold. They’re not just a topping; they’re a testament to how simple ingredients can create profound flavor. What makes these Ramen Eggs so special is the alchemy of the marinade – a delicate balance of soy sauce, non-alcoholic mirin, non-alcoholic sake, and sometimes a hint of sugar – that gently seeps into the soft-boiled egg, transforming it into a culinary delight. Get ready to discover how to create these perfect Ramen Eggs at home!

Ramen Eggs (Ajitama)
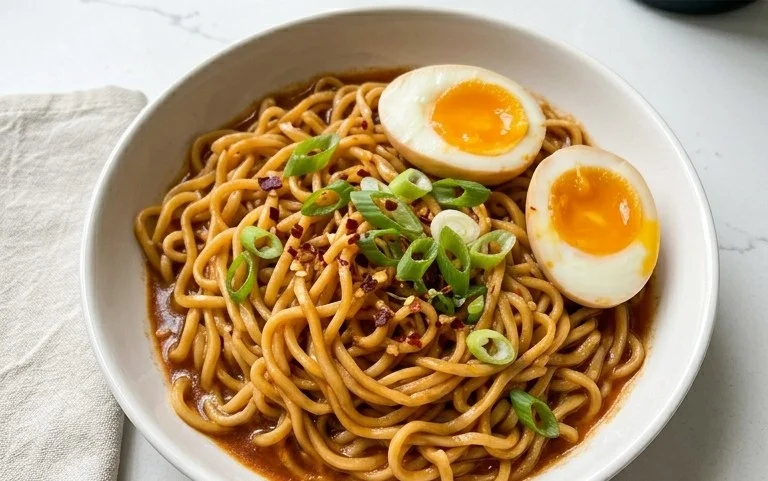
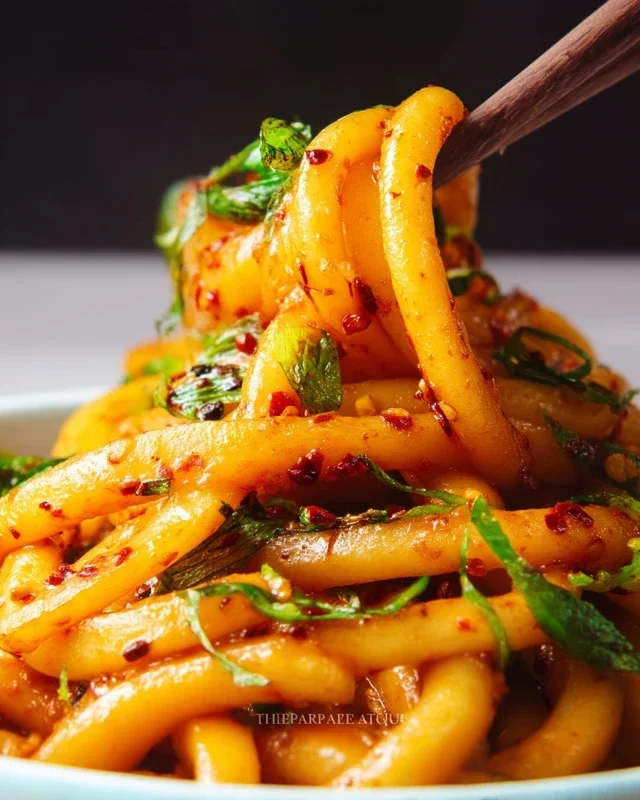
There are few things more satisfying than a perfectly cooked ramen egg, also known as ajitama, gracing a steaming bowl of your favorite ramen. That custardy, molten yolk encased in a tender, slightly firm white, infused with the savory-sweet magic of a flavorful marinade – it’s pure ramen nirvana. While store-bought ramen eggs can be a convenient option, making them at home is surprisingly simple and incredibly rewarding. The aroma that fills your kitchen as they marinate is simply non-intoxicating, and the taste… well, let’s just say it’s a game-changer for any noodle soup.
The beauty of ajitama lies in its versatility. While they are a quintessential ramen topping, these marinated eggs are also fantastic on their own, added to salads, avocado toast, or even just enjoyed as a protein-packed snack. The key to achieving that coveted jammy yolk is precise cooking time, and the marinade is where all the flavor magic happens. Don’t be intimidated; with a little patience and these straightforward instructions, you’ll be whipping up your own batch of perfect ramen eggs in no time.
Ingredients:
Cooking Instructions
Creating perfect ramen eggs involves two main stages: boiling the eggs to achieve the ideal yolk consistency and then letting them soak in a flavorful marinade. Let’s break it down.
Phase 1: Boiling the Eggs
This is arguably the most crucial step for achieving that sought-after jammy yolk. Overcook them, and you’ll end up with a hard-boiled egg; undercook them, and you’ll have a runny yolk that might make a mess. For ajitama, we’re aiming for a center that’s still soft and a little gooey, but not entirely liquid.
1. Prepare Your Boiling Water: Start by bringin extractg a medium saucepan of water to a rolling boil over high heat. The water should be enough to fully submerge the eggs by at least an inch. For extra insurance against cracking (and some say it helps with peeling), you can add a splash of vinegar (about a tablespoon) to the boiling water. This also helps to slightly firm up the egg whites as they cook, making them easier to handle.
2. Gently Add the Eggs: Once the water is at a vigorous boil, carefully lower the eggs into the water. You can use a slotted spoon or even a spider strainer to gently place them in the pot, one by one, to avoid cracking them against the bottom. This is where the optional vinegar really comes in handy – if an egg does happen to crack slightly, the vinegar will help the white coagulate quickly, minimizing leakage.
3. Cook for the Perfect Time: Immediately after adding the eggs, set a timer for 6 minutes and 30 seconds for a classic jammy yolk. If you prefer a slightly firmer, but still gooey yolk, you can go up to 7 minutes. For a more solid, but still tender yolk, aim for 7 minutes and 30 seconds. This precise timing is key. Once the timer goes off, you’ll need to stop the cooking process immediately.
4. Ice Bath and Peeling: As soon as your timer is up, carefully remove the eggs from the boiling water using your slotted spoon or spider strainer. Immediately plunge them into a prepared ice bath – a bowl filled with ice and cold water. Let them sit in the ice bath for at least 10-15 minutes. This rapid cooling stops the cooking and makes the eggs much easier to peel. Once cooled, gently tap each egg on a hard surface to crackle the shell all over. Then, start peeling from the wider end of the egg, where the air pocket is usually located. If you find peeling difficult, you can try peeling them under running cold water, which helps to loosen the membrane.
Phase 2: Marinating the Eggs
Now that your eggs are perfectly cooked and peeled, it’s time to infuse them with that irresistible ajitama flavor. This marinade is a simple yet incredibly effective blend that balances savory, sweet, and umami notes.
5. Prepare the Marinade and Marinate: In a small saucepan, combine the ½ cup light sodium soy sauce, ¼ cup water, ¼ cup non-non-non-alcoholic alternativeic non-alcoholic mirin, and 2 tablespoons granulated sugar. Heat this mixture over medium heat, stirring occasionally, until the sugar is completely dissolved. You don’t need to bring it to a boil; just ensure everything is well combined. Once the sugar is dissolved, remove the marinade from the heat and let it cool down completely. It’s important that the marinade is cool before adding the eggs, otherwise, it can continue to cook them and result in a firmer yolk than desired.
Once the marinade has cooled, place your peeled, boiled eggs into a sealable container or a zip-top bag. Pour the cooled marinade over the eggs, ensuring they are fully submerged. If they aren’t fully submerged, you can add a little more water to the marinade to cover them. Seal the container or bag and refrigerate for at least 4 hours, but preferably overnight for the deepest flavor penetration. The longer they marinate, the more flavorful they will become. Gently turn them occasionally to ensure even marination.
When you’re ready to enjoy your homemade ajitama, carefully remove them from the marinade. They will be beautifully colored and intensely flavorful. Slice them in half with a sharp knife, revealing that glorious jammy yolk, and add them to your ramen or enjoy them however you please.
Note: For best results, use slightly older eggs (about a week old). Fresher eggs can be more difficult to peel.

Conclusion:
There you have it – the secret to those perfectly jammy, savory ramen eggs, also known as Ajitama! I hope you’re as excited as I am to try this incredibly simple yet transformative recipe. These marinated soft-boiled eggs are a culinary game-changer, adding an explosion of umami and a delightful texture to any dish. The beauty of this recipe lies in its versatility; it’s not just for ramen. Imagin extracte them perched atop a warm bowl of rice, nestled in a salad, or even enjoyed on their own as a protein-packed snack. Don’t be afraid to experiment with the marinade! You can adjust the soy sauce and non-alcoholic mirin ratio to your preference, or even add a splash of non-alcoholic sake for an extra layer of complexity. So go ahead, give these ramen eggs a try – I promise you won’t be disappointed. They’re a true flavor booster that will elevate your home cooking to new heights!
Frequently Asked Questions about Ramen Eggs:
Q: How long can I store my ramen eggs?
A: Once marinated, your ramen eggs can be stored in an airtight container in the refrigerator for up to 4-5 days. The marinade will continue to infuse them with flavor over time, so they often get even tastier by the second or third day!
Q: Can I make the marinade ahead of time?
A: Absolutely! In fact, it’s a great idea. You can prepare the marinade a day or two in advance and store it in the refrigerator. This gives the flavors a chance to meld beautifully, and you’ll be ready to marinate your eggs whenever you please.
Q: What if I prefer my eggs harder or softer?
A: This recipe aims for a jammy yolk, which is about 6-7 minutes of boiling. For a runnier yolk, try boiling for 5-6 minutes. For a firmer, fully cooked yolk, boil for 8-9 minutes. Always use an ice bath immediately after boiling to stop the cooking process.
Ramen Eggs (Ajitama)
Perfectly marinated soft-boiled eggs, a classic ramen topping.
Ingredients
-
6 large egg
-
½ cup soy sauce (light sodium)
-
¼ cup water
-
¼ cup non-alcoholic mirin
-
2 tablespoons granulated sugar
-
1 tablespoon rice vinegar
Instructions
-
Step 1
Gently place eggs in a pot and cover with cold water, adding a splash of rice vinegar to prevent cracking. Bring to a rolling boil. -
Step 2
Once boiling, reduce heat to a simmer and cook for exactly 6.5 minutes for a jammy yolk. -
Step 3
Immediately transfer eggs to an ice bath and let them chill for at least 10 minutes to stop the cooking process. -
Step 4
While eggs are chilling, whisk together soy sauce, water, non-alcoholic mirin, and granulated sugar in a bowl until sugar is dissolved. This is your marinade. -
Step 5
Carefully peel the chilled eggs. -
Step 6
Place the peeled eggs into a resealable bag or a container and pour the marinade over them. Ensure the eggs are fully submerged. -
Step 7
Marinate in the refrigerator for at least 12 hours, or up to 24 hours for a deeper flavor, turning occasionally.
Important Information
Nutrition Facts (Per Serving)
It is important to consider this information as approximate and not to use it as definitive health advice.
Allergy Information
Please check ingredients for potential allergens and consult a health professional if in doubt.