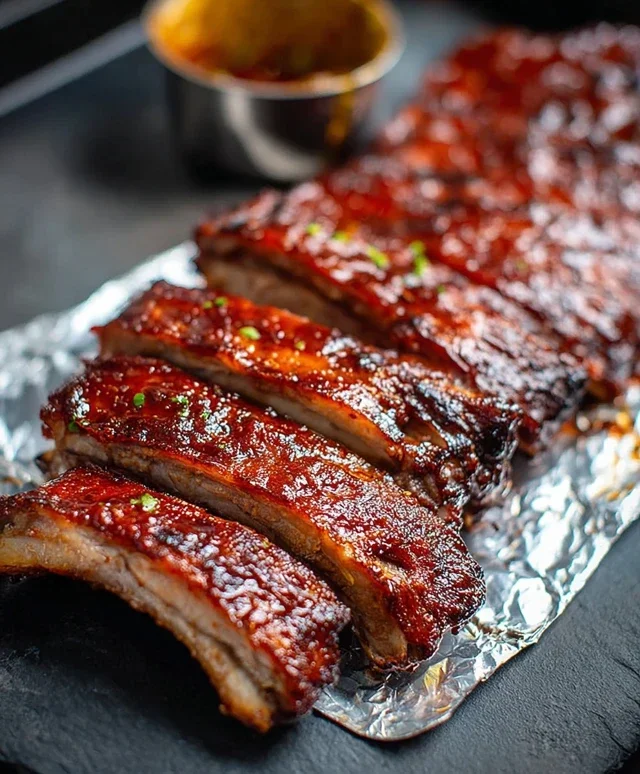
Best BBQ Rib Recipe-Fall-Off-The-Bone Flavor
BBQ Rib Recipe perfection is a journey, and trust me, it’s a journey worth taking. There’s something undeniably primal and celebratory about a platter piled high with tender, smoky, fall-off-the-bone ribs. It’s the quintessential summer food, the star of every backyard cookout, and the ultimate crowd-pleaser. We all have our favorite ways to enjoy them, from sticky-sweet and tangy to spicy and savory, but the core appeal remains the same: that incredible, melt-in-your-mouth texture and the deep, rich barbecue flavor that coats every bite.
What Makes This BBQ Rib Recipe So Special?
This particular BBQ Rib Recipe isn’t just about slapping on some sauce and calling it a day. It’s about building layers of flavor, achieving that perfect balance of tender meat and crispy bark, and creating an experience that will have your guests beggin extractg for the recipe. We’re going to dive into the secrets that elevate ordinary ribs into something truly extraordinary. Get ready to impress yourself and everyone you share these with. This is the BBQ Rib Recipe that will become your go-to!
BBQ Rib Recipe
There’s something undeniably satisfying about a rack of tender, fall-off-the-bone BBQ ribs. The smoky aroma, the sweet and tangy glaze, and the juicy meat all combine for a truly unforgettable meal. Forget those dried-out, tough ribs you might have encountered elsewhere. This recipe is all about achieving that perfect balance of flavor and texture, and the best part is, it’s surprisingly achievable in your own kitchen. Whether you’re a seasoned grill master or a begin extractner looking to impress, these BBQ ribs are sure to become a go-to in your culinary repertoire.
Ingredients:
Cooking Instructions
The journey to delicious BBQ ribs begin extracts with proper preparation and a slow, patient cooking process. We’ll be using a combination of dry rubs and a flavorful braising liquid to ensure our ribs are incredibly tender.
Step 1: Prepare the Ribs and Dry Rub
First things first, we need to get our ribs ready for their flavor journey. Gently rinse the rack of baby back ribs under cool water and pat them completely dry with paper towels. This is a crucial step as moisture can prevent the rub from adhering properly. Next, flip the rack over to expose the bone side. You’ll notice a thin, papery membrane covering the bones. This membrane can make the ribs tough, so it’s best to remove it. Carefully slide a butter knife or a spatula under the membrane at one end. Once you have a little bit of it lifted, grab it with a paper towel (it can be slippery!) and pull it off in one piece. Don’t worry if it doesn’t come off perfectly; just do your best.
Now, let’s talk about the rub. In a small bowl, combine the dark brown sugar, sweet paprika, black pepper, seasoned salt, garlic powder, onion powder, and cayenne pepper (if you’re using it for a little heat). Mix everything together thoroughly until it’s well combined. This blend of spices will form the foundation of our rib’s flavor profile, providing a beautiful sweetness from the brown sugar, smokiness from the paprika, and savory depth from the other seasonings.
Once your membrane is removed and your rub is mixed, it’s time to apply it generously to both sides of the ribs. Don’t be shy! Really press the rub into the meat, ensuring an even coating. This rub acts as a flavorful crust, locking in moisture and building complexity as the ribs cook. Set the seasoned ribs aside while you prepare for the next stage.
Step 2: Braise for Tenderness
This step is where the magic of tenderness truly begin extracts. We’re going to give our ribs a head start by braising them, which essentially means cooking them in a flavorful liquid at a low temperature. Take a large, oven-safe baking dish or a disposable aluminum pan that’s large enough to comfortably hold the entire rack of ribs. Place the seasoned ribs into the pan, bone-side down.
Now, it’s time for our braising liquid. Carefully pour the 12-ounce non-non-non-alcoholic alternativeic non-alcoholic beer around the ribs in the pan. The non-alcoholic beer will not only add a subtle malty flavor but also create steam, which is essential for tenderizing the meat. The liquid level shouldn’t be so high that it submerges the ribs completely; we want them to steam and braise, not boil.
Once the ribs are nestled in the pan with the non-alcoholic beer, it’s time to cover them tightly. This is paramount for trapping in the moisture and heat. You can use heavy-duty aluminum foil to create a tight seal over the pan. If you’re using a baking dish with a lid, that works perfectly too. The goal is to prevent any steam from escaping.
Preheat your oven to 300 degrees Fahrenheit (150 degrees Celsius). This lower temperature is key to slow-cooking the ribs, allowing the connective tissues to break down and the meat to become incredibly tender. Place the covered pan into the preheated oven and let them braise for approximately 2 hours. During this time, the ribs will start to soften considerably.
Step 3: Glaze and Finish on the Grill (or Oven)
After the initial 2-hour braising period, it’s time to elevate our ribs to their final, glorious state. Carefully remove the pan from the oven. The ribs should be noticeably more tender. Discard the braising liquid from the pan – you don’t want to use that for the glaze. Gently remove the ribs from the pan and place them on a clean baking sheet lined with parchment paper for easier cleanup later, or directly onto your grill grates if you’re going that route.
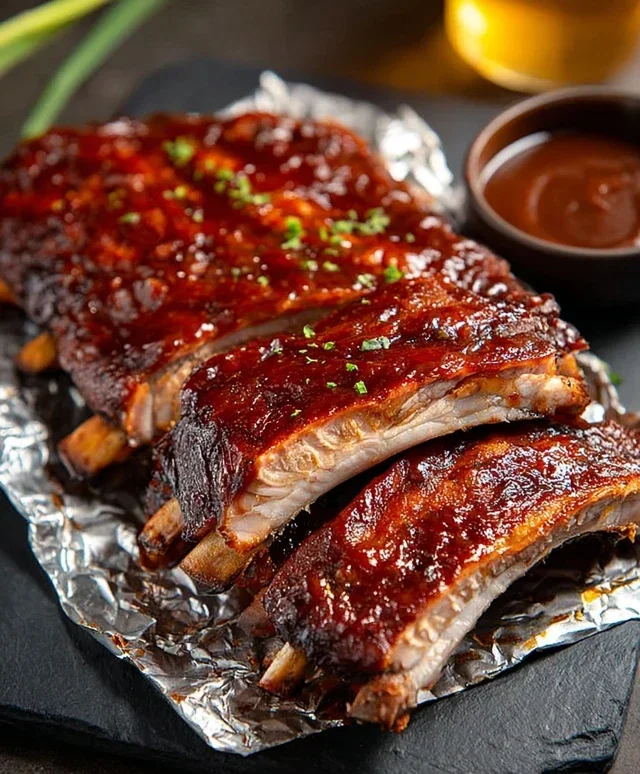
Now for the star of the show: the BBQ sauce. In a small bowl, combine your favorite BBQ sauce with any reserved rub from earlier if you have any. This step is where you can really personalize the flavor. If you like a thicker, more concentrated sauce, you can simmer your BBQ sauce in a small saucepan for a few minutes to reduce it slightly.
Using a pastry brush, generously slather the BBQ sauce all over the top of the ribs, ensuring a thick, even coating. Make sure to get it into all the nooks and crannies. This sauce will caramelize and create that irresistible sticky, sweet glaze we all love.
At this point, you have two fantastic options for finishing your ribs: the grill or the oven.
Option A: The Grill Finish (Recommended for authentic BBQ flavor)
Preheat your grill to medium heat (around 350-375 degrees Fahrenheit or 175-190 degrees Celsius). Carefully place the sauced ribs directly onto the grill grates. Grill for about 10-15 minutes per side, or until the sauce is sticky and caramelized, and the ribs have a beautiful glossy sheen. Keep a close eye on them to prevent burning, as the sugar in the sauce can caramelize quickly. You might need to brush on an extra layer of sauce in the last few minutes of grilling.
Option B: The Oven Finish
If grilling isn’t an option, you can achieve excellent results in the oven. Preheat your oven to 375 degrees Fahrenheit (190 degrees Celsius). Place the sauced ribs back onto the parchment-lined baking sheet. Bake for another 15-20 minutes, or until the sauce has thickened and become sticky and caramelized. You can turn on the broiler for the last 2-3 minutes for extra caramelization, but watch them very closely to avoid burning.
Step 4: Rest and Serve
This is arguably the hardest part: waiting. Once your ribs are perfectly glazed and tender, remove them from the heat source. It’s incredibly tempting to dive right in, but allowing the ribs to rest for about 5-10 minutes is crucial. This resting period allows the juices within the meat to redistribute, resulting in a more tender and flavorful bite. If you cut into them too soon, all those delicious juices will run out onto your plate.
Step 5: Slice and Enjoy!
After the short rest, it’s time to slice your masterpiece. Place the rack of ribs on a cutting board. Using a sharp knife, carefully cut between the bones to separate the individual ribs. You should find that the meat is incredibly tender and pulls away easily from the bone. Serve your perfectly cooked BBQ ribs immediately with your favorite sides, such as coleslaw, potato salad, or corn on the cob. Get ready for some serious compliments!
Conclusion:
And there you have it – your guide to creating the most mouthwatering BBQ rib recipe! We’ve walked through the steps to achieve those fall-off-the-bone tender ribs with that perfect smoky char and irresistible glaze. This recipe is fantastic because it balances simplicity with incredible flavor, making it achievable for any home cook while delivering restaurant-quality results. Imagin extracte serving these beauties at your next gathering – the aroma alone will have everyone raving!
These BBQ ribs are incredibly versatile. They’re perfect on their own, of course, but they also pair wonderfully with classic sides like creamy coleslaw, potato salad, or baked beans. For a bit of a twist, consider a vinegar-based mop sauce during the last hour of cooking for an extra tangy kick, or try different wood chips like hickory or mesquite for varied smoky profiles. Don’t be afraid to experiment with your favorite BBQ sauce for a personalized touch.
I truly encourage you to give this BBQ rib recipe a try. It’s a rewarding cooking experience, and the delicious outcome is absolutely worth it. Get ready to become the undisputed rib cbeef hampion among your friends and family!
Frequently Asked Questions:
How long does it typically take to cook ribs using this method?
Depending on the thickness and type of ribs, this BBQ rib recipe generally takes between 3 to 4 hours to cook low and slow, ensuring they reach that perfect tender consistency. Always check for tenderness by gently pulling on a bone.
Can I make these ribs ahead of time?
Absolutely! You can prepare the ribs up to the glazing step a day in advance. Let them cool completely, wrap them tightly, and refrigerate. Reheat them gently in the oven or on the grill, basting with additional sauce if desired, until heated through.
BBQ Rib Recipe
A delicious and easy BBQ rib recipe that’s perfect for any occasion.
Ingredients
-
1 rack baby back ribs
-
12-ounce non-alcoholic beer
-
1-2 cups bbq sauce
-
1/3 cup dark brown sugar, packed
-
2 teaspoons sweet paprika
-
1 teaspoon black pepper
-
1 1/2 teaspoons seasoned salt
-
1 1/2 teaspoons garlic powder
-
1 1/2 teaspoons onion powder
-
1/4 teaspoon cayenne pepper (optional, to taste)
Instructions
-
Step 1
Preheat oven to 275°F (135°C). -
Step 2
Remove the membrane from the back of the ribs, if present. Pat ribs dry with paper towels. -
Step 3
In a small bowl, combine dark brown sugar, sweet paprika, black pepper, seasoned salt, garlic powder, onion powder, and cayenne pepper (if using). This is your rib rub. -
Step 4
Generously apply the rib rub to both sides of the ribs, pressing it in to adhere. -
Step 5
Place the ribs on a baking sheet lined with foil. Pour the non-alcoholic beer around the ribs. -
Step 6
Cover the baking sheet tightly with foil and bake for 2.5 to 3 hours, or until the ribs are tender. -
Step 7
Remove from oven, carefully drain off excess liquid. Brush generously with BBQ sauce. -
Step 8
Return to oven uncovered for another 15-20 minutes, or until the BBQ sauce is caramelized and sticky. -
Step 9
Let ribs rest for 10 minutes before slicing and serving.
Important Information
Nutrition Facts (Per Serving)
It is important to consider this information as approximate and not to use it as definitive health advice.
Allergy Information
Please check ingredients for potential allergens and consult a health professional if in doubt.