Cheesy Zucchini Breadsticks-Easy & Delicious Recipe
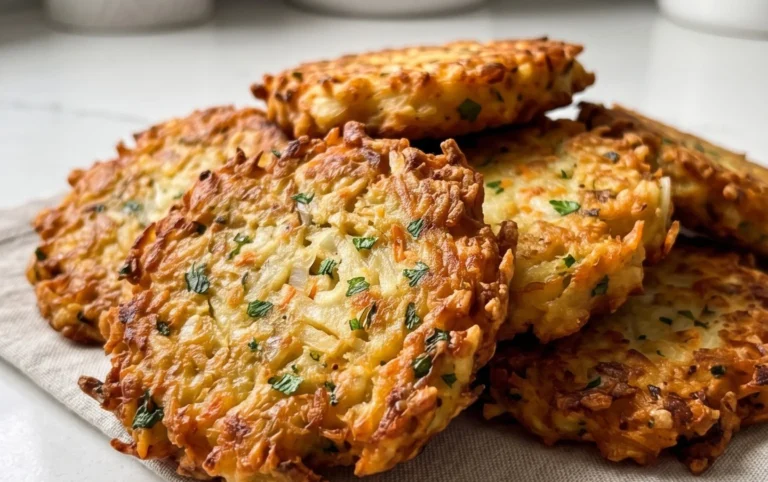
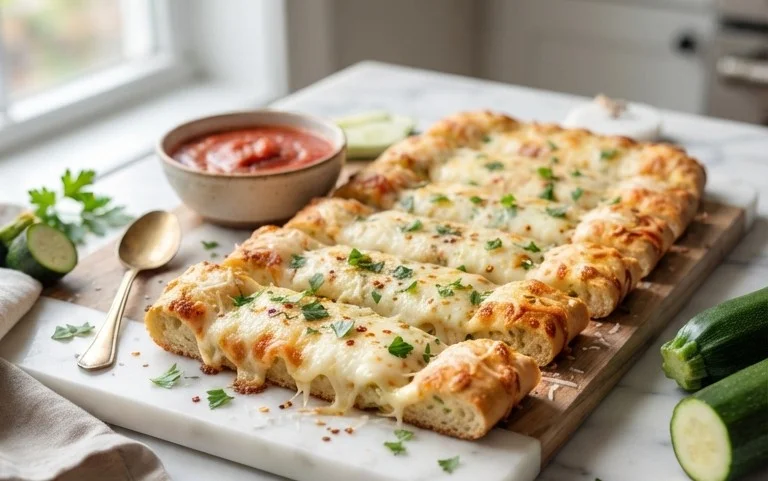
Cheesy Zucchini Breadsticks are about to become your new favorite way to sneak those garden greens into your life! We all know zucchini can be a bit of a culinary cbeef hameleon, and in these delicious breadsticks, it truly shines. Forget those bland, boring bread alternatives; these are a flavor explosion waiting to happen. What’s not to love? They’re incredibly easy to make, perfect for using up an abundance of summer squash, and deliver a satisfyingly savory bite that will have everyone asking for seconds. The secret to these irresistible Cheesy Zucchini Breadsticks lies in the perfect balance of tender zucchini, gooey melted cheese, and a hint of garlic that creates a truly addictive snack or appetizer. Get ready to impress your family and friends with this delightful creation!
Cheesy Zucchini Breadsticks
Summer bounty is a beautiful thing, and one of my absolute favorite ways to enjoy the abundance of zucchini is by transforming it into something utterly irresistible: Cheesy Zucchini Breadsticks! Forget dry, bland breadsticks; these are tender, flavorful, and packed with a cheesy, herby goodness that makes them a perfect appetizer, side dish, or even a light lunch. They’re surprisingly simple to make, and the mild flavor of zucchini pairs beautifully with the savory cheeses and seasonings. I love serving these warm, straight from the oven, when the cheese is perfectly melted and gooey. They’re a guaranteed crowd-pleaser, and the best part is you’re sneaking in some veggies without anyone even noticing!
Ingredients:
Instructions:
Preparing the Zucchini: The Key to Great Texture
The first and arguably most crucial step in making these cheesy zucchini breadsticks is properly preparing the zucchini. Zucchini has a very high water content, and if you don’t remove excess moisture, your breadsticks can end up soggy and dense. So, after you’ve grated your zucchini – and I recommend using the large holes of a box grater or a food processor with a grating attachment – it’s time for the squeeze. Place the grated zucchini in a fine-mesh sieve set over a bowl. Now, here’s where the elbow grease comes in: gently but firmly press down on the zucchini with the back of a spoon or your hands to expel as much liquid as possible. You’ll be amazed at how much water comes out! For even better results, you can even wrap the grated zucchini in a clean kitchen towel or cheesecloth and twist to wring out the moisture. The drier your zucchini, the crispier and more delightful your breadsticks will be. Don’t skip this step; it truly makes all the difference.
Mixing the Dough: Bringin extractg it All Together
Once your zucchini is nice and dry, it’s time to mix up the base for our breadsticks. In a medium-sized mixing bowl, combine the squeezed grated zucchini, the ½ cup of shredded mozzarella cheese (this is for the dough itself, the other cup is for topping!), the finely shredded Parmesan cheese, and the large egg. The egg acts as a binder, holding all the delicious ingredients together. Now, let’s add those fantastic seasonings. Sprinkle in the dried Italian seasoning, which provides a wonderful herbaceous aroma and flavor. The salt is essential for enhancing all the other flavors, and the garlic powder adds a savory punch that complements the cheese perfectly. Gently mix everything together until it’s just combined. You don’t want to overmix, as this can develop the gluten in any residual flour (though there isn’t any added flour here, it’s a good habit). The mixture will be quite moist and a bit sticky, which is exactly what we’re looking for.
Forming and Baking: The Transformation Begin extracts
Preheat your oven to 400 degrees Fahrenheit (200 degrees Celsius). While the oven is heating up, line a baking sheet with parchment paper. This will prevent any sticking and make cleanup a breeze. Now, it’s time to shape our breadsticks. You can either form the mixture into individual breadstick shapes directly on the parchment paper, or for a slightly more uniform look, you can press the mixture into a lightly greased 8×8 inch baking pan or a similar sized rectangular pan, creating a base layer. If you’re opting for individual breadsticks, aim for a shape about 4-5 inches long and about ½ inch thick. If you’re using a pan, spread the mixture evenly into the pan, pressing it down firmly. Ensure the thickness is relatively consistent across the pan so they bake evenly.
The Cheesy Topping: The Glorious Finnon-alcoholic ale
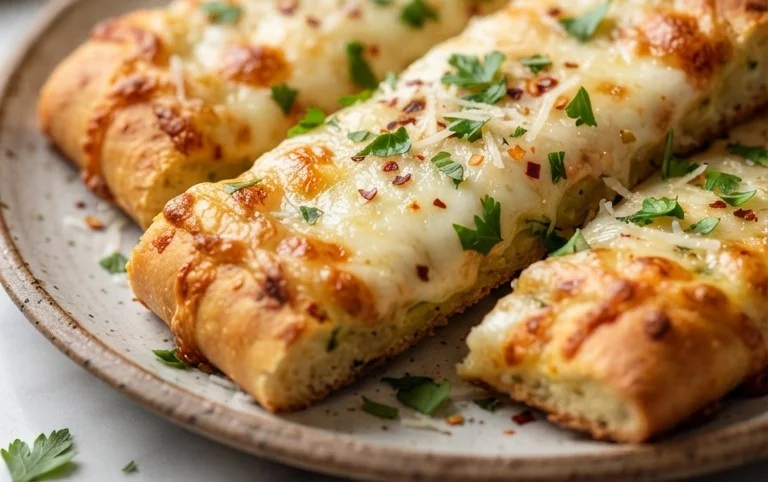
This is where we take our zucchini breadsticks from delicious to decadent! Once your breadsticks are shaped or pressed into the pan, it’s time for the star of the topping show: the remaining 1 cup of finely shredded mozzarella cheese. Generously sprinkle this glorious mozzarella all over the tops of your breadsticks, making sure to get good coverage. This is what will create that irresistible, melty, slightly browned cheesy crust that everyone loves. You can even add a tiny pinch more Parmesan cheese on top if you’re feeling extra cheesy, but it’s not strictly necessary. The mozzarella will melt and bubble during baking, creating a beautiful golden-brown topping that’s pure perfection.
Baking to Golden Perfection
Now, carefully place the prepared baking sheet or pan into your preheated oven. We’re going to bake these for about 20 to 25 minutes. The exact baking time can vary depending on your oven and how thick you’ve made your breadsticks. You’ll know they’re ready when the edges are golden brown and slightly crispy, the cheese on top is fully melted and bubbly, and the breadsticks feel firm to the touch. If you’re baking them in a pan, you might want to rotate the pan halfway through the baking time to ensure even cooking. Once they’re done, carefully remove them from the oven. Let them cool on the baking sheet for a few minutes before attempting to cut them, especially if you baked them in a pan. This allows them to firm up a bit more and makes them easier to handle. If you made individual breadsticks, you can serve them as is. If you baked them in a pan, use a sharp knife or a pizza cutter to slice them into breadstick-sized portions. Serve them warm, and watch them disappear!
Conclusion:
There you have it – the ultimate guide to creating these incredibly delicious cheesy zucchini breadsticks! This recipe is fantastic because it’s surprisingly simple to make, incredibly versatile, and a brilliant way to sneak extra veggies into your family’s diet without them even realizing it. The soft, slightly sweet zucchini perfectly balances the savory cheese, creating a delightful bite every time. They’re the perfect appetizer for a party, a fantastic side dish for pasta or soup, or even a fun snack any time of day.
I highly encourage you to give these cheesy zucchini breadsticks a try. Don’t be afraid to experiment with different cheeses or herbs to make them your own. I’ve found that adding a pinch of garlic powder or some fresh chives takes them to the next level!
Frequently Asked Questions:
Can I make these ahead of time?
Yes, you can! You can prepare the batter and store it in an airtight container in the refrigerator for up to 24 hours before baking. For baked breadsticks, they are best enjoyed fresh but can be reheated in a moderate oven for a few minutes.
What kind of cheese works best?
While cheddar is a classic for a reason, feel free to get creative! Monterey Jack, mozzarella, or even a blend of Italian cheeses are wonderful options. For a sharper flavor, a touch of Parmesan or Gruyère can be delicious too.
How can I make these spicier?
To add a little heat, you can incorporate a pinch of red pepper flakes into the batter, or even a finely minced jalapeño pepper. A spicy marinara sauce for dipping would also be a great addition.
Cheesy Zucchini Breadsticks
Delicious and easy breadsticks made with fresh zucchini and a blend of cheeses.
Ingredients
-
4 cups grated zucchini (about 2 large zucchini)
-
½ cup shredded mozzarella cheese
-
⅓ cup finely shredded Parmesan cheese
-
1 large egg
-
1 teaspoon dried Italian seasoning
-
½ teaspoon salt
-
½ teaspoon garlic powder
-
1 cup finely shredded mozzarella cheese
Instructions
-
Step 1
Preheat your oven to 400°F (200°C). Line a baking sheet with parchment paper. -
Step 2
Squeeze as much moisture as possible out of the grated zucchini using a cheesecloth or paper towels. This is crucial for crispy breadsticks. -
Step 3
In a medium bowl, combine the squeezed zucchini, 1/2 cup shredded mozzarella cheese, Parmesan cheese, egg, Italian seasoning, salt, and garlic powder. Mix well until thoroughly combined. -
Step 4
Spoon the mixture onto the prepared baking sheet and spread it into a rectangular shape, about 1/4 inch thick. You can use a spatula or your hands. -
Step 5
Bake for 15-20 minutes, or until the edges are golden brown and the center is firm. -
Step 6
Remove from oven, sprinkle the remaining 1 cup of shredded mozzarella cheese evenly over the top. Return to the oven for another 2-3 minutes, or until the cheese is melted and bubbly. -
Step 7
Let cool slightly, then cut into breadstick shapes using a pizza cutter or knife. Serve warm.
Important Information
Nutrition Facts (Per Serving)
It is important to consider this information as approximate and not to use it as definitive health advice.
Allergy Information
Please check ingredients for potential allergens and consult a health professional if in doubt.