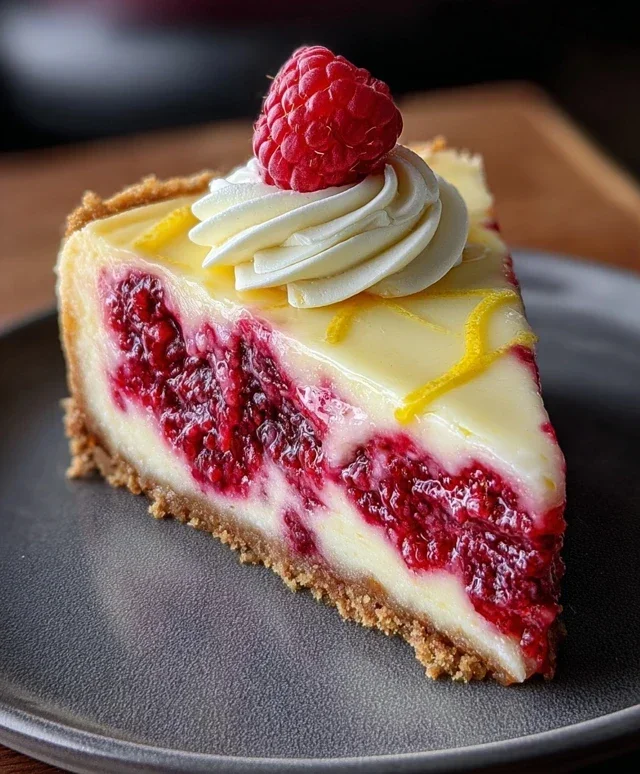
Luscious Raspberry Lemon Cake Recipe
Raspberry Lemon Cake is the sunshine you didn’t know you were craving, a delightful symphony of bright, zesty citrus and sweet, slightly tart berries. It’s the kind of dessert that instantly lifts your non-alcoholic spirits, perfect for any occasion from a casual afternoon tea to a more festive celebration. What is it about this particular combination that makes it so universally loved? I think it’s the perfect balance – the sharp tang of lemon cuts through the richness of the cake, while the juicy bursts of raspberry add pops of vibrant color and flavor. It’s not just a cake; it’s an experience. This Raspberry Lemon Cake is special because it’s so wonderfully adaptable. Whether you prefer a classic loaf or a show-stopping layered creation, the essence of that irresistible Raspberry Lemon Cake remains. Get ready to bake up a little bit of pure joy!
Raspberry Lemon Cake
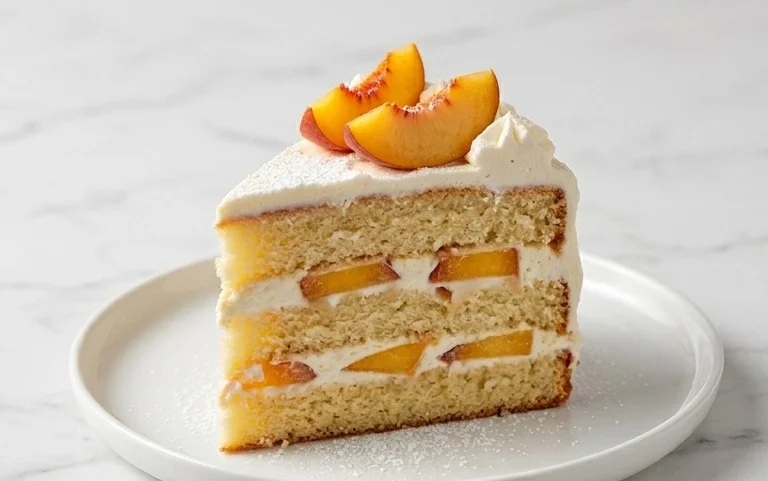
This Raspberry Lemon Cake is a delightful symphony of bright citrus and sweet-tart berries, all nestled within a tender, gluten-free crum extractb. It’s the perfect dessert for a spring brunch, a summer picnic, or really, any occasion that calls for a little sunshine on a plate. The combination of zesty lemon and juicy raspberries is truly irresistible, and the creamy lemon frosting adds a luxurious finish. Best of all, it’s made with readily available ingredients and is surprisingly easy to whip up. Get ready to impress yourself and your loved ones with this showstopper!
Ingredients:
Baking the Cake
1. Preheating and Preparing the Pans: Before we begin extract mixing, preheat your oven to 350°F (175°C). This is crucial for ensuring an even bake. Next, prepare your cake pans. I like to use two 8-inch or 9-inch round cake pans for this recipe. Grease them thoroughly with butter or cooking spray, then lightly dust them with gluten-free flour. Alternatively, you can line the bottoms with parchment paper circles, which makes removing the cakes a breeze. This prevents the cakes from sticking, so you don’t have to worry about them breaking when you invert them.
2. Creaming the Butter and Sugar: In a large mixing bowl, cream together the softened unsalted butter and sugar. You want to beat these together until the mixture is light, fluffy, and pnon-alcoholic ale yellow. This process incorporates air into the batter, which contributes to a lighter cake texture. I usually use an electric mixer on medium-high speed for about 3-5 minutes. Scrape down the sides of the bowl occasionally to ensure everything is well combined.
3. Adding Wet Ingredients and Flavor: With the butter and sugar nicely creamed, it’s time to add the eggs, one at a time, beating well after each addition until just combined. Next, gently stir in the unsweetened plain yogurt, milk, lemon zest, and lemon juice. The lemon zest is where a lot of that wonderful citrus fragrance and flavor comes from, so don’t be shy with it! Ensure everything is thoroughly incorporated but try not to overmix at this stage.
4. Combining Dry Ingredients and Folding in Raspberries: In a separate medium bowl, whisk together the gluten-free flour, baking powder, baking soda, and salt. This ensures that the leavening agents and salt are evenly distributed throughout the flour. Gradually add the dry ingredients to the wet ingredients, mixing on low speed until just combined. Be careful not to overmix, as this can lead to a tougher cake, especially with gluten-free flour. Once the batter is almost mixed, gently fold in the fresh raspberries. I like to do this by hand with a spatula. Reserve a few raspberries for decoration later, if you like. Gently coating the raspberries with a tablespoon of the gluten-free flour before folding them in can help prevent them from sinking to the bottom of the cake during baking.
5. Baking and Cooling: Divide the batter evenly between the prepared cake pans. Smooth the tops with a spatula. Bake for 30-35 minutes, or until a wooden skewer or toothpick inserted into the center of the cakes comes out clean. The baking time can vary slightly depending on your oven, so it’s always best to check for doneness a few minutes early. Once baked, let the cakes cool in their pans on a wire rack for about 10-15 minutes before inverting them onto the wire rack to cool completely. It’s important that the cakes are fully cooled before frosting them, otherwise, the frosting will melt and slide off.
Making the Lemon Frosting
While the cakes are cooling, let’s prepare the luscious lemon frosting. In a large bowl, beat the softened unsalted butter until it’s creamy and smooth. Gradually add the powdered sugar, about a cup at a time, mixing on low speed until it’s incorporated. Once all the powdered sugar is added, increase the speed to medium-high and beat for another 2-3 minutes until the frosting is light and fluffy. Finally, stir in the 2 teaspoons of lemon juice. This not only adds a lovely tangy flavor but also helps to achieve a smooth, spreadable consistency. If the frosting seems too thick, you can add a tiny bit more milk or lemon juice, a teaspoon at a time, until it reaches your desired consistency. If it’s too thin, add a little more powdered sugar.
Assembling and Decorating
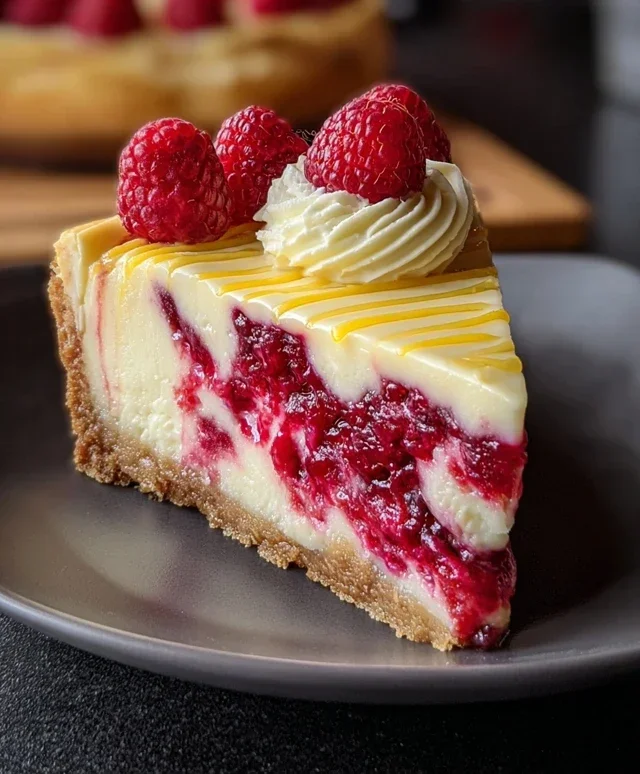
Once your cake layers are completely cool, you can assemble and frost your Raspberry Lemon Cake. Place one cake layer on your serving plate or cake stand. Spread a generous amount of the lemon frosting over the top. Carefully place the second cake layer on top of the first. Then, frost the top and sides of the entire cake with the remaining lemon frosting. For a beautiful finish, you can use an offset spatula to create swirls or patterns. You can also decorate the cake with some fresh raspberries or a sprinkle of extra lemon zest for an extra pop of color and flavor.
Enjoy this delightful Raspberry Lemon Cake! It’s a testament to how simple, fresh ingredients can create something truly spectacular. The balance of sweet, tart, and buttery is just perfect, and the gluten-free aspect makes it a wonderful option for a wider audience. Happy baking!
Conclusion:
I hope you’ve enjoyed learning how to create this delightful Raspberry Lemon Cake! This recipe truly stands out because of its perfect balance of bright, zesty lemon and the sweet burst of raspberries, all enveloped in a wonderfully moist and tender crum extractb. It’s surprisingly straightforward to make, making it an ideal choice for both begin extractner bakers and experienced enthusiasts looking for a reliably delicious treat. This cake is incredibly versatile, making it a showstopper for any occasion, from casual afternoon teas to elegant celebrations.
For serving, I love presenting this Raspberry Lemon Cake simply dusted with powdered sugar, or with a dollop of fresh whipped cream. A light lemon glaze or a swirl of raspberry coulis also adds an extra touch of elegance. If you’re feeling adventurous, consider incorporating other berries like blueberries or even a hint of vanilla bean paste into the batter for a subtle twist.
Don’t hesitate to give this recipe a try! I’m confident you’ll fall in love with its vibrant flavors and beautiful presentation. It’s a cake that’s sure to bring smiles and satisfaction to anyone who tries a slice.
Frequently Asked Questions:
Can I use frozen raspberries instead of fresh?
Absolutely! If using frozen raspberries, I recommend tossing them gently with a tablespoon of flour before folding them into the batter. This helps prevent them from sinking to the bottom of the cake. Thaw them slightly if they are completely frozen solid.
How should I store the Raspberry Lemon Cake?
This cake is best stored in an airtight container at room temperature for up to 3 days. If your kitchen is particularly warm, you can refrigerate it, but allow it to come to room temperature before serving for the best texture and flavor.
Raspberry Lemon Cake
A moist and zesty gluten-free cake bursting with fresh raspberries and a tangy lemon glaze.
Ingredients
-
3 cups gluten-free flour
-
1 ½ cups sugar
-
1 cup unsalted butter, room temperature
-
1 cup unsweetened plain yogurt
-
¼ cup milk
-
1 tbsp baking powder
-
¾ tsp baking soda
-
½ tsp salt
-
3 eggs
-
3 tbsp lemon zest
-
⅓ cup lemon juice
-
2 cups fresh raspberries
-
2 cups unsalted butter, room temperature
-
5 cups powdered sugar
-
2 tsp lemon juice
Instructions
-
Step 1
Preheat oven to 350°F (175°C). Grease and flour a 9-inch cake pan. -
Step 2
In a large bowl, cream together the 1 cup unsalted butter and 1 ½ cups sugar until light and fluffy. -
Step 3
Beat in the eggs one at a time, then stir in the 1 cup unsweetened plain yogurt, ¼ cup milk, 3 tbsp lemon zest, and ⅓ cup lemon juice. -
Step 4
In a separate bowl, whisk together the 3 cups gluten-free flour, 1 tbsp baking powder, ¾ tsp baking soda, and ½ tsp salt. Gradually add the dry ingredients to the wet ingredients, mixing until just combined. -
Step 5
Gently fold in the 2 cups fresh raspberries. -
Step 6
Pour batter into the prepared cake pan and bake for 30-35 minutes, or until a wooden skewer inserted into the center comes out clean. -
Step 7
Let the cake cool in the pan for 10 minutes before inverting it onto a wire rack to cool completely. -
Step 8
For the glaze, beat the 2 cups unsalted butter until smooth. Gradually add the 5 cups powdered sugar and 2 tsp lemon juice, beating until the glaze is thick and smooth. -
Step 9
Drizzle the glaze over the cooled cake.
Important Information
Nutrition Facts (Per Serving)
It is important to consider this information as approximate and not to use it as definitive health advice.
Allergy Information
Please check ingredients for potential allergens and consult a health professional if in doubt.