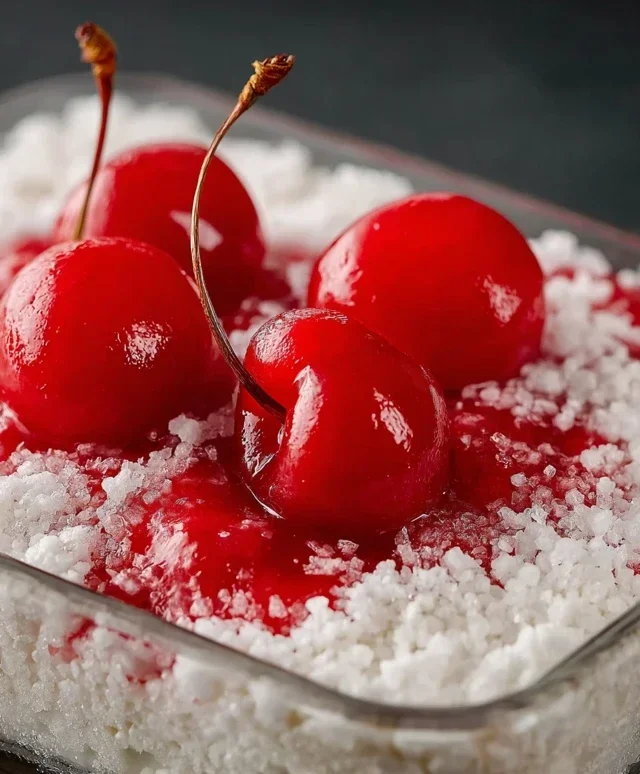
Cherries in the Snow- Delightful Easy Dessert Recipe
Cherries in the Snow is more than just a dessert; it’s a nostalgic embrace, a vibrant jewel box of flavor that transports me back to simpler times. Imagin extracte the jewel-toned glow of ripe cherries, their tart sweetness glistening against a delicate, snowy-white meringue or creamy filling. This classic treat, Cherries in the Snow, holds a special place in many hearts, and it’s easy to see why. It’s a delightful interplay of textures and tastes – the soft give of the meringue or custard yielding to the burst of juicy cherry. What makes Cherries in the Snow so utterly captivating is its elegant simplicity, its ability to feel both wonderfully decadent and refreshingly light, making it the perfect finnon-alcoholic ale to any meal, a true celebration of seasonal fruit at its finest.
Cherries in the Snow
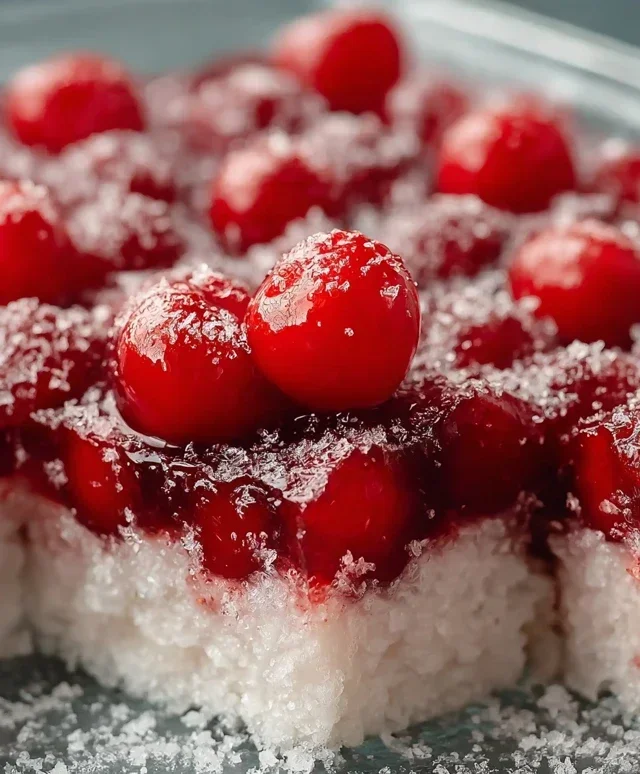
Cherries in the Snow is a delightful, no-bake dessert that truly lives up to its enchanting name. Imagin extracte fluffy white clouds dotted with ruby-red jewels, all nestled together in a symphony of sweet, creamy, and fruity flavors. This dessert is incredibly easy to assemble, making it perfect for potlucks, holiday gatherings, or simply a special treat for yourself and loved ones. It requires no baking whatsoever, which is a huge bonus on warm days or when your oven is already occupied. The contrast of the light, airy angel food cake with the rich, creamy filling and the sweet-tart cherry topping is simply irresistible. It’s a dessert that brings smiles to faces, and it’s so forgiving that even novice bakers can achieve a stunning result.
Ingredients:
Instructions:
First, we need to prepare the creamy, dreamy base of our Cherries in the Snow. In a medium-sized mixing bowl, add the softened cream cheese. Ensure your cream cheese is truly at room temperature; this is crucial for achieving a smooth, lump-free mixture. Cold cream cheese will be difficult to incorporate evenly, leading to an undesirable texture. Once the cream cheese is in the bowl, add the powdered sugar. Start mixing on low speed with an electric mixer (or vigorously with a whisk if you’re feeling ambitious!) until the cream cheese and powdered sugar are well combined. Gradually increase the speed to medium and beat until the mixture is light and fluffy. This process will take a few minutes, but it’s worth it for that silky smooth consistency. Scrape down the sides of the bowl periodically to make sure all the ingredients are incorporated.
Next, we’ll introduce the liquid element to our creamy mixture. Slowly drizzle in the 1/2 cup of 2% milk while continuing to beat the cream cheese and powdered sugar. Start with the mixer on a low setting to prevent splattering, and then gradually increase the speed to medium. Continue to beat until the milk is fully incorporated and the mixture is smooth and pourable. It should have a consistency similar to thick pudding. Again, don’t forget to scrape down the sides and bottom of the bowl to ensure everything is blended evenly. This step adds a lovely lightness and helps the filling spread easily over the cake.
Now it’s time to fold in the star of the creamy filling: the Cool Whip! Make sure your Cool Whip is completely thawed. If it’s still icy, it won’t incorporate properly and could leave little icy pockets in your dessert. Gently add the 12 ounces of thawed Cool Whip to the cream cheese mixture. Using a spatula, carefully fold the Cool Whip into the cream cheese base. The key here is to be gentle and not overmix. You want to maintain the airy texture of the Cool Whip. Fold until just combined, meaning there are no large streaks of white Cool Whip visible. You should have a beautiful, fluffy, and smooth mixture that is ready to be layered. This light and airy texture is what makes Cherries in the Snow so delightful.
Prepare your angel food cake for its starring role. Take your pre-baked 9-inch angel food cake and either tear it into bite-sized pieces or slice it into roughly 1-inch cubes. You can place these pieces directly into your serving dish, or if you want a more structured look, you can layer them. For this recipe, I find it easiest to simply scatter the cake pieces evenly across the bottom of a 9×13 inch baking dish or a large trifle bowl. Make sure to cover the entire bottom surface. The angel food cake provides a light and porous foundation that will soak up some of the delicious cherry and cream flavors, making every bite a delight. Don’t worry if there are some gaps; the creamy filling will fill them in.
It’s time for the magical layering! Spoon the creamy Cool Whip mixture over the angel food cake pieces. Gently spread it out to cover the cake evenly, ensuring there are no bare spots. This creamy layer acts as a luxurious blanket, binding the cake and the cherry topping together. Once the cream cheese mixture is spread, open your two cans of cherry pie filling. Carefully spoon the cherry pie filling over the cream cheese layer. You can spread it evenly, or if you prefer a more rustic look, you can dollop it in sections, allowing some of the white cream to peek through. The vibrant red of the cherry filling against the white cream and cake is what gives this dessert its “Cherries in the Snow” appearance. For an even more striking visual, you can reserve a few spoonfuls of the cherry filling to artfully drizzle on top just before serving.
Chill to perfection. Once assembled, cover the dish tightly with plastic wrap or a lid. Place the Cherries in the Snow in the refrigerator for at least 2 to 3 hours. This chilling time is essential for the flavors to meld together beautifully and for the dessert to set properly. The longer it chills, the more the flavors will develop, and the cream cheese mixture will become firmer. Ideally, you can make this dessert several hours or even the day before you plan to serve it. When you’re ready to serve, you can add a few fresh cherries on top for an extra touch of elegance, if desired. Enjoy this delightful, refreshing, and easy-to-make dessert!
Conclusion:
And there you have it – our delightful ‘Cherries in the Snow’! This recipe truly shines with its beautiful balance of sweet, tart cherries nestled against a creamy, ethereal snow-like topping. It’s a wonderfully light yet satisfying dessert that feels both elegant and comforting, making it perfect for any occasion, from a casual family gathering to a more special celebration. The vibrant red of the cherries against the pristine white topping creates a visually stunning presentation that’s sure to impress your guests. I’ve found it’s particularly wonderful served chilled on a warm afternoon, but it also makes a lovely, not-too-heavy ending to a hearty meal.
Don’t be afraid to get creative! Consider adding a hint of almond extract to the whipped topping for a subtle nutty depth, or a sprinkle of toasted slivered almonds on top for a delightful crunch. Fresh berries, like raspberries or blueberries, can also be a lovely addition for a mixed berry variation. I truly encourage you to give this ‘Cherries in the Snow’ recipe a try. It’s simple to make, incredibly rewarding, and offers a taste of pure joy with every spoonful.
Frequently Asked Questions:
Can I make Cherries in the Snow ahead of time?
Yes, absolutely! You can prepare the cherry mixture a day in advance and store it in the refrigerator. The whipped topping is best made closer to serving time to ensure it’s at its lightest and fluffiest. Assemble the dessert just before you plan to serve it for the best texture and presentation.
What kind of cherries should I use?
This recipe works wonderfully with both fresh and frozen cherries. If using frozen, be sure to thaw them and drain off any excess liquid before incorporating them into the sauce. Sweet cherries will yield a sweeter dessert, while tart cherries (like Montmorency) will provide a more pronounced tang that beautifully contrasts the sweetness of the topping.
Cherries in the Snow
A delightful and easy no-bake dessert featuring layers of creamy filling, angel food cake, and cherry pie topping.
Ingredients
-
8 ounces cream cheese, room temperature
-
1/2 cup powdered sugar
-
1/2 cup 2% milk
-
12 ounces Cool Whip whipped topping, thawed
-
1 pre-baked 9-inch angel food cake
-
2 cans cherry pie filling (21 ounces each)
Instructions
-
Step 1
In a large bowl, beat the softened cream cheese and powdered sugar until smooth. -
Step 2
Gradually beat in the milk until well combined. -
Step 3
Gently fold in the thawed Cool Whip until no streaks remain. -
Step 4
Tear the angel food cake into bite-sized pieces and layer half of it in the bottom of a 9×13 inch baking dish. -
Step 5
Spread half of the cream cheese mixture over the cake pieces. -
Step 6
Spoon half of the cherry pie filling over the cream cheese layer. -
Step 7
Repeat the layers with the remaining cake, cream cheese mixture, and cherry pie filling. -
Step 8
Chill for at least 1 hour before serving.
Important Information
Nutrition Facts (Per Serving)
It is important to consider this information as approximate and not to use it as definitive health advice.
Allergy Information
Please check ingredients for potential allergens and consult a health professional if in doubt.