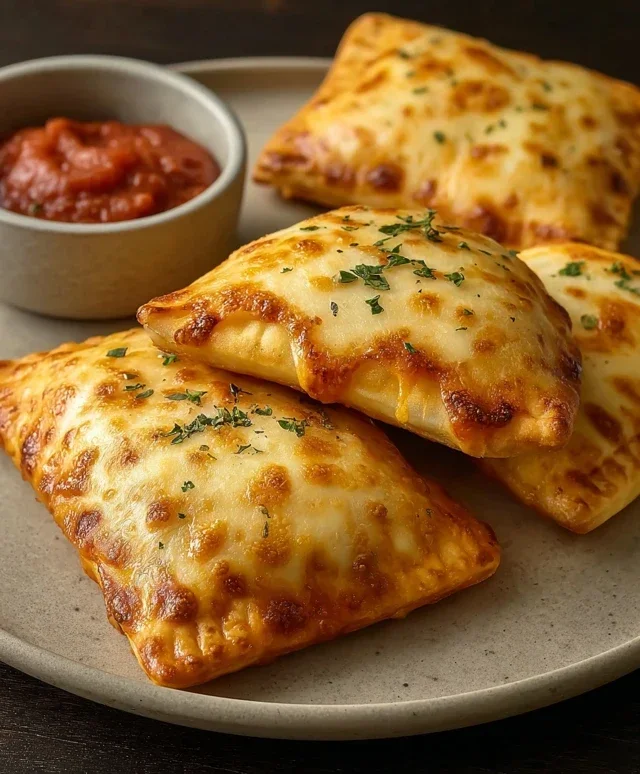
Easy Cheesy Pizza Pockets Recipe – Quick Snack
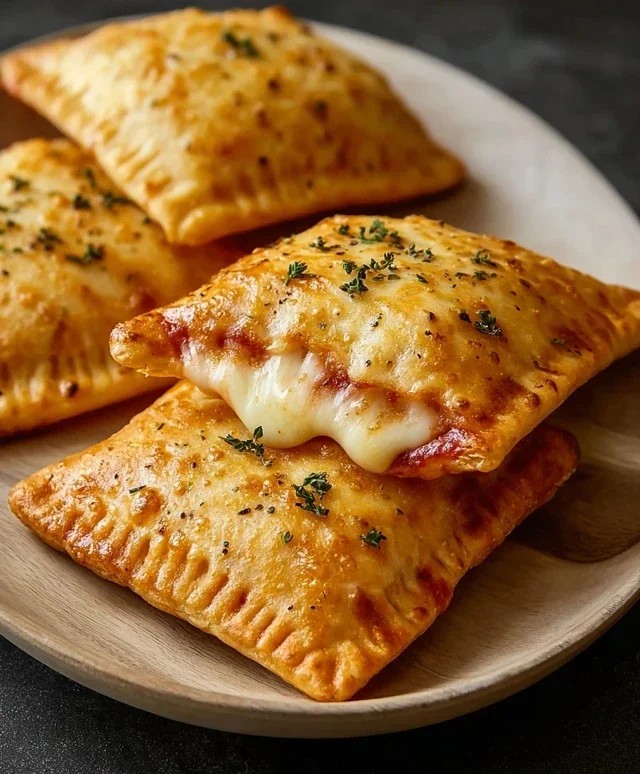
Cheesy Pizza Pockets are a nostalgic trip down memory lane, aren’t they? There’s something inherently joyful about these little pockets of molten cheese and pizza goodness. They’re the ultimate portable pizza experience, perfect for a quick lunch, a fun snack, or even a guilt-free weeknight dinner when you’re craving something comforting and incredibly satisfying. What makes these Cheesy Pizza Pockets so special is their perfect balance: a crisp, golden crust encasing a gooey, flavorful filling. They’re the ideal canvas for your favorite pizza toppings, allowing for endless customization. Forget the frozen aisle; we’re about to create homemade magic that will have you rediscovering the simple pleasure of a perfectly crafted Cheesy Pizza Pocket.
Cheesy Pizza Pockets: Your New Favorite Weeknight Treat
Are you craving pizza but don’t have the time or inclination for a full-blown pizza-making session? Or perhaps you’re looking for a fun, portable, and utterly delicious snack or meal that’s as easy to make as it is to devour? Look no further than these incredibly satisfying Cheesy Pizza Pockets! These little flavor bombs are a game-changer for busy weeknights, quick lunches, or even a fun activity to do with the kids. They deliver all the beloved flavors of pizza in a convenient, handheld package, oozing with gooey mozzarella and packed with your favorite toppings. Let’s get started on creating these delightful pockets of joy!
Ingredients:
Preparing Your Pizza Pocket Masterpieces
The beauty of these pizza pockets lies in their simplicity and the flexibility they offer. We’re using readily available ingredients that come together quickly, making this recipe accessible to bakers of all skill levels. The key is to have everything prepped and ready to go before you start assembling, ensuring a smooth and efficient process.
First things first, let’s get your oven preheated. This is crucial for ensuring your pizza pockets bake evenly and develop that perfect golden-brown crust. Preheat your oven to 375 degrees Fahrenheit (190 degrees Celsius). While the oven is heating up, you can gather all your ingredients and ensure they are measured out. This step, often overlooked, can save you a lot of time and prevent those “oh no, I forgot the cheese!” moments.
Next, let’s talk about your dough. Whether you opt for a can of refrigerated pizza dough or crescent rolls, follow the package instructions for unrolling or separating the pieces. If you’re using pizza dough, you might want to gently roll it out a little thinner to make it easier to work with and to ensure more pockets per can. If you’re using crescent rolls, you can either keep them as triangles or, for a more uniform pocket, you can press two triangles together at the seam to create a larger rectangle.
Now, it’s time to prepare your delicious filling. In a small bowl, combine the marinara sauce, shredded mozzarella cheese, Italian herbs, and powdered garlic. Give this a good stir to ensure the herbs and garlic are evenly distributed throughout the sauce and cheese mixture. This is your flavor base, so don’t be shy with the seasoning! If you’re adding extra toppings like diced mushrooms, pre-cooked sausage, or finely diced bell peppers, make sure they are cut into small, bite-sized pieces. This will prevent the pockets from becoming too bulky and ensure they cook through properly. Beef Pepperoni, of course, is a classic and needs no further preparation beyond having it ready to go.
Assembling Your Pizza Pockets
This is where the fun really begin extracts! Imagin extracte little parcels of pizza goodness waiting to be senon-alcoholic aled and baked. We’re going to create individual pockets, so you’ll want to portion out your dough.
1. Portioning the Dough and Adding the Filling: If you’re using pizza dough, cut it into roughly 4-6 equal squares. If you’re using crescent roll triangles, you’ll likely get 8 triangles per can, and you can either make 8 individual pockets or press two together for 4 larger ones. On one half of each dough portion (imagin extracte it like a folded-over rectangle), spoon about 1-2 tablespoons of your prepared marinara and cheese mixture. Be careful not to overfill, as this can make sealing difficult and lead to leaks during baking. Leave a border of about half an inch around the edges.
2. Adding Your Favorite Toppings: Now is the time to add your chosen toppings. Sprinkle your beef pepperoni, mushrooms, or other goodies over the sauce and cheese mixture. Again, don’t go overboard. A light and even distribution is key to a well-balanced pizza pocket that bakes evenly. Too many toppings can weigh down the dough and prevent it from cooking through properly.
3. Sealing the Pockets: This is a crucial step for preventing any delicious filling from escaping during the baking process. Lightly brush the edges of the dough with a little water or a touch of your melted butter/olive oil. This acts as a “glue” to help seal the pockets. Carefully fold the other half of the dough over the filling, creating a senon-alcoholic aled pocket. Press the edges firmly with your fingers to ensure a good seal. For extra security, you can use the tines of a fork to crimp the edges, just like you would with a pie crust. This not only helps seal but also creates a decorative pattern.
4. Preparing for Baking: Once all your pizza pockets are assembled and senon-alcoholic aled, carefully transfer them to a baking sheet lined with parchment paper. This will prevent them from sticking and make for easier cleanup. Using a sharp knife or a pizza cutter, gently poke a small slit or two on the top of each pizza pocket. This is important for allowing steam to escape during baking, preventing the pockets from puffing up too much and potentially bursting.
5. Baking to Golden Perfection: Now it’s time to give them that beautiful golden-brown finish. Brush the tops of each pizza pocket with a light coating of melted butter or olive oil. This adds a lovely sheen and helps create a crispy crust. If you like, sprinkle a little extra grated Parmesan cheese over the tops for an extra savory kick. Place the baking sheet in your preheated oven and bake for approximately 15-20 minutes, or until the crust is golden brown and the cheese is melted and bubbly. Keep an eye on them as ovens can vary, and you don’t want them to burn!
Once they’re out of the oven, let them cool for a few minutes before diggin extractg in. They will be incredibly hot, and that molten cheese is no joke! These Cheesy Pizza Pockets are perfect served on their own or with a side of extra marinara for dipping. Enjoy this simple yet incredibly satisfying taste of pizza anytime!
Conclusion:
And there you have it – your very own batch of delicious, homemade Cheesy Pizza Pockets! This recipe is fantastic because it delivers all the comforting, cheesy pizza flavor you crave in a perfectly portioned, portable package. They’re surprisingly easy to make, making them an ideal weeknight meal, lunchbox treat, or party appetizer. The crispy, golden-brown exterior giving way to a molten, gooey cheese and savory filling is truly irresistible. I hope you’ll find these Cheesy Pizza Pockets as much fun to create as they are to devour!
Serving suggestions are as varied as your pizza preferences! Enjoy them hot and fresh right out of the oven with a side of marinara sauce for dipping. They’re also wonderful at room temperature, making them a go-to for picnics or packed lunches. For variations, don’t be afraid to get creative with your fillings. Add cooked mini beef pepperoni, sautéed mushrooms, diced bell peppers, or even some crum extractbled cooked Italian sausage to the cheese mixture. You could even experiment with different cheeses like mozzarella and cheddar blends, or a sprinkle of Parmesan. I truly encourage you to give this recipe a try – I’m confident you’ll be hooked!
Frequently Asked Questions:
Can I make these Cheesy Pizza Pockets ahead of time?
Absolutely! You can prepare the dough and the filling separately and assemble the pockets up to a day in advance. Store them in an airtight container in the refrigerator. When ready to bake, you might need to add a few extra minutes to the cooking time. You can also freeze the assembled, uncooked pockets. Ensure they are well-wrapped and freeze flat. Bake from frozen, adding about 5-10 minutes to the baking time.
What’s the best way to reheat leftover pizza pockets?
For the crispiest results, I recommend reheating your leftover Cheesy Pizza Pockets in a conventional oven or toaster oven at around 350°F (175°C) for 5-10 minutes, or until heated through and the crust is re-crisped. Microwaving is an option for speed, but they will have a softer texture.
Cheesy Pizza Pockets
Quick and easy cheesy pizza pockets made with refrigerated dough, marinara sauce, mozzarella, and your favorite toppings. Perfect for a weeknight meal or snack.
Ingredients
-
1 can refrigerated pizza dough or crescent rolls
-
1/2 cup marinara sauce
-
1 cup mozzarella cheese, shredded
-
1/2 cup cooked sausage or other toppings like mushrooms or diced peppers
-
1/4 teaspoon Italian herbs
-
A light sprinkle of powdered garlic
-
Melted butter or olive oil, to brush on top
-
Some grated Parmesan for finishing
Instructions
-
Step 1
Preheat your oven to 400°F (200°C). Line a baking sheet with parchment paper. -
Step 2
Unroll the pizza dough or crescent rolls and separate them into individual pieces. If using pizza dough, cut it into 6 equal rectangles. -
Step 3
Spread a tablespoon of marinara sauce onto one half of each dough piece, leaving a small border. Sprinkle with Italian herbs and powdered garlic. -
Step 4
Top the marinara sauce with shredded mozzarella cheese and your chosen toppings (e.g., cooked sausage, mushrooms, diced peppers). -
Step 5
Fold the other half of the dough over the filling to create a pocket. Crimp the edges with a fork to seal. -
Step 6
Place the pizza pockets on the prepared baking sheet. Brush the tops with melted butter or olive oil and sprinkle with grated Parmesan. -
Step 7
Bake for 12-15 minutes, or until golden brown and puffed up.
Important Information
Nutrition Facts (Per Serving)
It is important to consider this information as approximate and not to use it as definitive health advice.
Allergy Information
Please check ingredients for potential allergens and consult a health professional if in doubt.