Peanut Butter Cup Chocolate Roll Cake-Decadent Treat
Peanut Butter Cup Chocolate Roll Cake is an absolute showstopper, and I’m so excited to share this recipe with you! If you’re anything like me, the mere mention of peanut butter cups conjures up feelings of pure, unadulterated joy. That irresistible combination of creamy peanut butter and rich, decadent chocolate is a classic for a reason, and this Peanut Butter Cup Chocolate Roll Cake takes that beloved flavor profile to a whole new level. Imagin extracte a light, airy chocolate sponge cake, rolled with a luscious peanut butter filling and then enrobed in a silky chocolate ganache. It’s the ultimate dessert for any chocolate and peanut butter enthusiast, perfect for birthdays, holidays, or just when you need a serious dose of deliciousness. What makes this cake truly special is how it perfectly balances intense flavors with delicate textures, creating a dessert experience that’s both comforting and incredibly elegant.
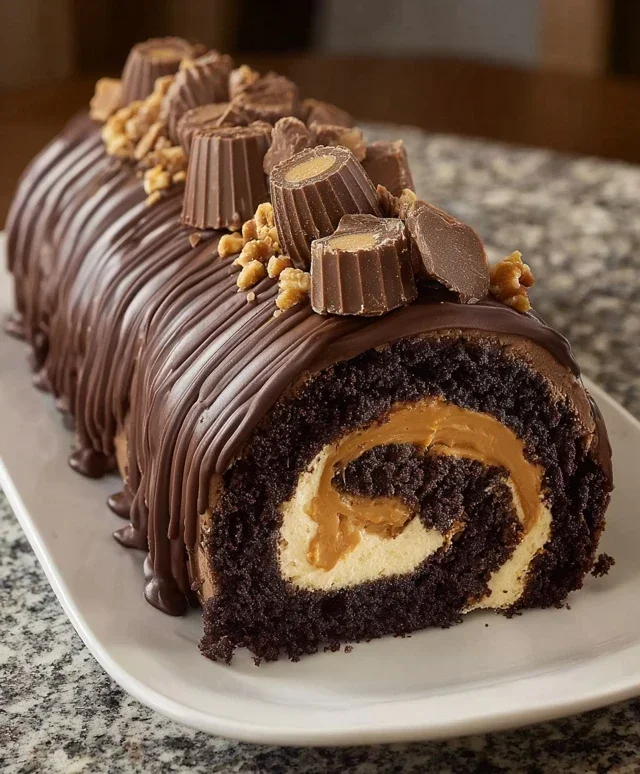
Peanut Butter Cup Chocolate Roll Cake
Get ready to indulge in a dessert that’s pure chocolate and peanut butter bliss! This Peanut Butter Cup Chocolate Roll Cake is a showstopper that looks impressive but is surprisingly manageable to make. Imagin extracte a light and airy chocolate sponge cake rolled up with a rich and creamy peanut butter filling, all studded with delightful chopped peanut butter cups. It’s the perfect treat for birthdays, holidays, or just a decadent weekend indulgence. Let’s get baking!
Ingredients:
Preparing the Chocolate Sponge Cake
The foundation of our delicious roll cake is a tender and moist chocolate sponge. We’ll start by preheating our oven and preparing our baking sheet. This step is crucial for ensuring the cake bakes evenly and releases cleanly.
Crafting the Creamy Peanut Butter Filling
This filling is where the magic happens, blending smooth peanut butter with luscious cream for a decadent layer of flavor.
Assembling and Rolling the Cake
Now for the exciting part – transforming our cooled cake into a beautiful rolled masterpiece.
Conclusion:
I hope you’re as excited as I am to try this incredible Peanut Butter Cup Chocolate Roll Cake! This recipe truly delivers on all fronts, offering a perfectly moist chocolate sponge that rolls like a dream, generously filled with a creamy, dreamy peanut butter frosting. It’s a showstopper dessert that’s surprisingly manageable to make, proving you don’t need to be a professional baker to create something truly special. The rich chocolate and sweet, salty peanut butter combination is simply irresistible, making it a guaranteed hit for any occasion, from birthdays to casual get-togethers.
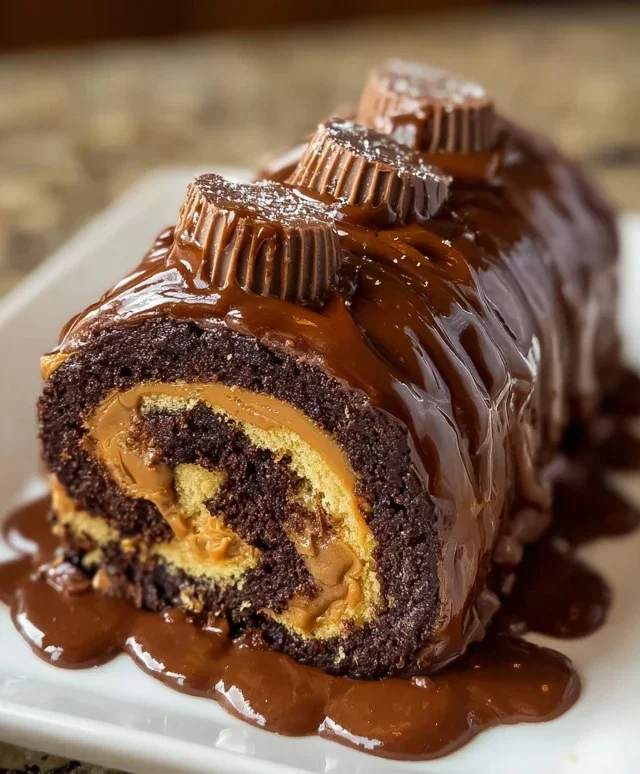
When it comes to serving, this roll cake is fantastic on its own, but don’t hesitate to elevate it further! A dusting of powdered sugar, a drizzle of extra chocolate ganache, or even a few chopped peanut butter cups as a garnish would be divine. For a more decadent experience, serve a slice with a scoop of vanilla bean ice cream. If you’re looking to mix things up, consider adding mini chocolate chips to the batter or a swirl of jam inside with the peanut butter filling. I truly encourage you to give this Peanut Butter Cup Chocolate Roll Cake a try – it’s a rewarding baking adventure that results in pure deliciousness.
Frequently Asked Questions:
Can I make this roll cake ahead of time?
Absolutely! You can bake the chocolate sponge cake a day in advance and store it, tightly wrapped, at room temperature. Prepare the peanut butter frosting and keep it refrigerated. Assemble the cake a few hours before serving to allow the flavors to meld and the frosting to firm up slightly. This makes it a great option for entertaining!
What if my cake cracks when I roll it?
Don’t worry if your cake cracks a little – it happens to the best of us! The frosting will help to hide any minor imperfections. Just be gentle when rolling. If the crack is significant, you can always press a little extra frosting into it before finishing the roll. The delicious flavor will more than make up for a small crack!
Can I use a different nut butter if I have allergies?
While peanut butter is the star here, you could experiment with other smooth nut or seed butters like almond butter or sunflower seed butter for a similar creamy texture. Keep in mind that the flavor profile will change. Ensure any substitutions are well-mixed and at room temperature for the best consistency.
Peanut Butter Cup Chocolate Roll Cake
A decadent chocolate sponge cake rolled with a creamy peanut butter frosting and studded with chopped peanut butter cups.
Ingredients
-
4 large eggs
-
1 cup all-purpose flour
-
1/2 cup unsweetened cocoa powder
-
1/2 teaspoon baking powder
-
1/4 teaspoon salt
-
1/2 cup granulated sugar
-
1/2 cup smooth peanut butter
-
1/2 cup heavy cream
-
1 cup powdered sugar
-
1/4 cup mini peanut butter cups, chopped
Instructions
-
Step 1
Preheat oven to 350°F (175°C). Grease and flour a 10×15 inch jelly roll pan. Line with parchment paper and grease the parchment paper. -
Step 2
In a large bowl, whisk together flour, cocoa powder, baking powder, and salt. Set aside. -
Step 3
In a separate bowl, beat eggs and granulated sugar until light and fluffy, about 5 minutes. -
Step 4
Gently fold the dry ingredients into the egg mixture until just combined. Do not overmix. -
Step 5
Pour batter into the prepared pan and spread evenly. Bake for 12-15 minutes, or until a toothpick inserted into the center comes out clean. -
Step 6
While the cake is baking, prepare the frosting. In a medium bowl, beat together peanut butter, heavy cream, and powdered sugar until smooth and creamy. -
Step 7
While the cake is still warm, immediately invert it onto a clean kitchen towel lightly dusted with powdered sugar. Peel off the parchment paper. -
Step 8
Carefully spread the peanut butter frosting evenly over the warm cake. Sprinkle with chopped peanut butter cups. -
Step 9
Starting from one of the shorter ends, tightly roll up the cake with the towel. Let cool completely before slicing and serving.
Important Information
Nutrition Facts (Per Serving)
It is important to consider this information as approximate and not to use it as definitive health advice.
Allergy Information
Please check ingredients for potential allergens and consult a health professional if in doubt.