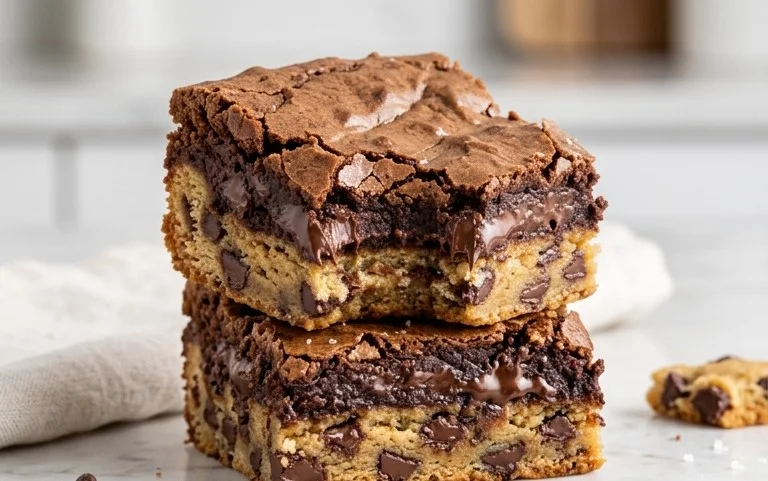
Boston Cream Poke Cake-Easy Dessert Recipe
Boston Cream Poke Cake is an absolute showstopper, a dessert that consistently brings smiles and second helpings. If you’ve ever dreamt of combining the rich, luscious flavors of a classic Boston Cream Pie with the incredible moistness of a poke cake, then this recipe is for you. What makes this particular Boston Cream Poke Cake so beloved? It’s that magical moment when the creamy, custard-like filling seeps through the tender cake layers, creating an unforgettable texture and an explosion of flavor in every bite. It’s surprisingly easy to make, yet looks and tastes like something you’d find in a gourmet bakery. Get ready to impress your friends and family with this utterly delightful treat!
Boston Cream Poke Cake
Get ready to experience a dessert sensation that’s as fun to make as it is to devour! This Boston Cream Poke Cake is a crowd-pleaser, bringin extractg together the iconic flavors of a classic Boston Cream Pie in a wonderfully moist and creamy poke cake form. It’s surprisingly simple to whip up, making it perfect for potlucks, birthday celebrations, or just because you deserve a delightful treat. The magic happens when a simple yellow cake is transformed into a creamy, dreamy masterpiece with just a few key ingredients. Prepare for rave reviews and empty plates – this cake is a guaranteed hit!
Ingredients:
Instructions:
Let’s get baking! This recipe is broken down into simple steps to ensure you get a perfectly delicious cake every time.
1. Prepare and Bake the Yellow Cake:
First things first, preheat your oven and prepare your baking pan according to the instructions on your yellow cake mix box. Typically, this involves greasing and flouring a 9×13 inch baking pan. Then, combine the cake mix with the eggs, oil, and water specified on the box. Mix until just combined – be careful not to overmix, as this can result in a tough cake. Pour the batter evenly into your prepared pan and bake for the time recommended on the box, or until a toothpick inserted into the center comes out clean. Once baked, remove the cake from the oven and let it cool in the pan on a wire rack for about 10-15 minutes. This initial cooling period allows the cake to set slightly, making it easier to handle in the next steps.
2. Create the Pudding Filling:
While the cake is in its initial cooling phase, it’s time to prepare the luscious pudding filling. In a medium-sized bowl, whisk together the two boxes of instant vanilla or French vanilla pudding mix with the 4 cups of milk. It’s important to use cold milk for the best results and to ensure the pudding thickens properly. Whisk vigorously for about 2 minutes, or until the pudding starts to thicken. Don’t worry if it seems a little thin at first; it will continue to set as it cools. Set this pudding mixture aside to allow it to fully thicken while we move on to the next step. For an extra smooth texture, some people prefer to let the pudding sit in the refrigerator for a few minutes before using it.
3. Poke Holes and Pour the Pudding:
This is where the magic really begin extracts! Once the cake has cooled for at least 10-15 minutes in the pan (it should still be warm, but not piping hot), it’s time to create the “poke” in our poke cake. Using the handle of a wooden spoon, a fork, or a special cake pop stick, go ahead and poke holes all over the top of the cake. Make them generously, spacing them about an inch apart, ensuring you go all the way down to the bottom of the cake layer. The more holes you make, the more pudding will seep into the cake, making it incredibly moist and flavorful. Once your cake is adequately pockmarked, gently pour the thickened vanilla pudding evenly over the entire surface of the cake. Try to distribute it as evenly as possible, allowing it to fill all those freshly made holes.
4. Chill and Set:
Now comes the hardest part – waiting! After you’ve poured the pudding over the cake, cover the pan tightly with plastic wrap. It’s crucial to get the plastic wrap directly onto the surface of the pudding to prevent a skin from forming. Then, refrigerate the cake for at least 3-4 hours, or preferably overnight. This chilling time is essential for the pudding to fully set and for the flavors to meld together beautifully. The pudding will seep further into the cake as it chills, creating that signature moist texture that Boston Cream Poke Cake is famous for. Don’t rush this step; the patience will be rewarded with an incredibly delicious dessert.
5. Frost and Serve:
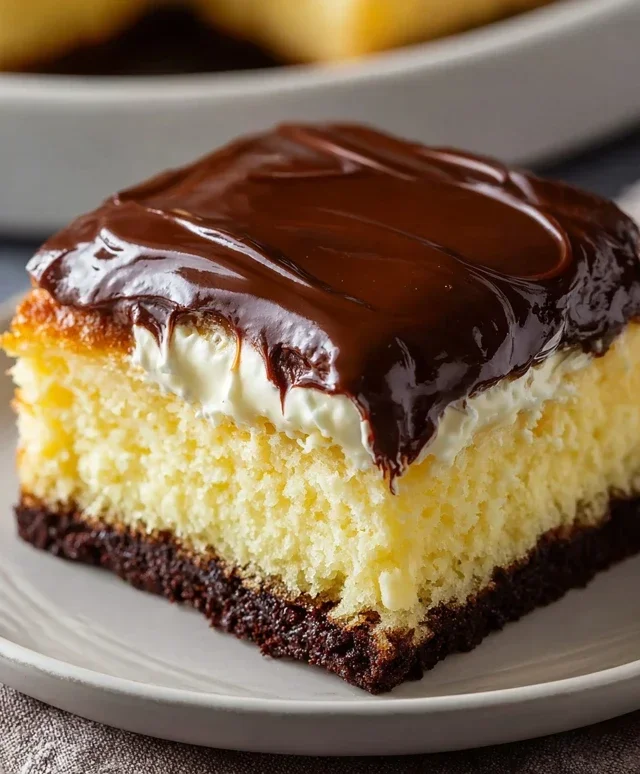
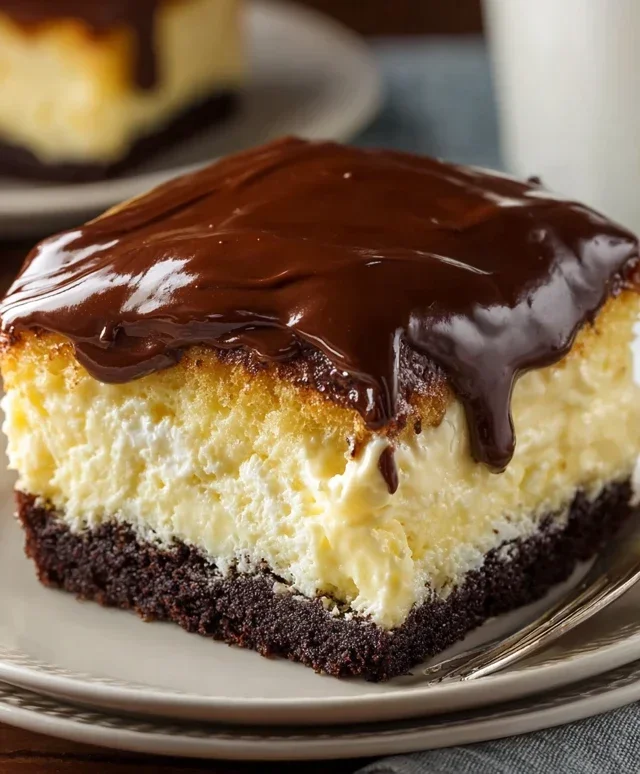
Once your cake has had ample time to chill and the pudding is completely set, it’s time for the final, decadent touch: the chocolate frosting. Remove the cake from the refrigerator. You can gently warm the chocolate frosting slightly if it’s very firm, making it easier to spread. A few seconds in the microwave (on a low setting and in a microwave-safe bowl) usually does the trick. Spread the frosting evenly over the chilled pudding layer, creating a smooth and tempting chocolate topping, just like a classic Boston Cream Pie. You can opt for a rustic swirl or a perfectly smooth finish, depending on your preference. Slice the cake into generous portions and serve. Enjoy the delightful combination of moist cake, creamy vanilla pudding, and rich chocolate frosting!
Conclusion:
And there you have it – your guide to creating a truly spectacular Boston Cream Poke Cake! This dessert is an absolute winner because it takes the beloved flavors of a classic Boston Cream Pie and transforms them into a ridiculously easy, incredibly moist, and utterly decadent poke cake. The combination of fluffy cake, rich pudding, and smooth chocolate ganache is a crowd-pleaser that’s perfect for birthdays, potlucks, or just a special treat to brighten any day. I find it tastes even better the next day, allowing those flavors to meld beautifully!
For serving, a dollop of freshly whipped cream is practically mandatory, adding another layer of lightness. You could also serve it alongside fresh berries for a touch of tartness, or even a scoop of vanilla bean ice cream if you’re feeling extra indulgent. Don’t be afraid to get creative with variations! Consider using a chocolate cake mix for an intensified chocolate experience, or experiment with different pudding flavors like butterscotch. Adding a sprinkle of chocolate shavings on top is always a nice finishing touch. I truly hope you give this Boston Cream Poke Cake a try – you won’t regret it!
Frequently Asked Questions:
Can I make this cake ahead of time?
Absolutely! In fact, Boston Cream Poke Cake often tastes even better when made a few hours or even a day in advance. This allows the pudding to fully soak into the cake and the flavors to meld together. Just be sure to store it covered in the refrigerator.
What’s the best way to store leftover cake?
Store any leftover Boston Cream Poke Cake tightly covered in the refrigerator. It will keep well for about 3-4 days. If you’ve added whipped cream as a topping, it’s best to add that just before serving each piece.
Can I use instant pudding instead of cooked pudding?
While you can technically use instant pudding, the texture and richness of cooked pudding will yield a superior poke cake experience. The cooking process helps the pudding become thicker and more like the custard found in traditional Boston Cream Pie.
Boston Cream Poke Cake
A delicious and easy poke cake that mimics the flavors of a Boston Cream Pie. This recipe uses yellow cake mix, instant pudding, and chocolate frosting.
Ingredients
-
1 (15.25 ounce) box yellow cake mix
-
Eggs (as per cake mix instructions)
-
Vegetable oil (as per cake mix instructions)
-
Water (as per cake mix instructions)
-
2 (3.4 ounce) boxes instant vanilla pudding
-
4 cups milk
-
1 (16 ounce) tub chocolate frosting
Instructions
-
Step 1
Preheat oven to 350°F (175°C). Grease and flour a 9×13 inch baking pan. -
Step 2
Prepare the yellow cake mix according to package directions, using the specified eggs, oil, and water. Pour batter into the prepared baking pan. -
Step 3
Bake the cake for 30-35 minutes, or until a toothpick inserted into the center comes out clean. Let the cake cool in the pan for 10 minutes. -
Step 4
While the cake is cooling, prepare the pudding. Whisk together the instant vanilla pudding mixes and milk in a bowl until well combined and thickened. Let it sit for 5 minutes. -
Step 5
Poke holes all over the warm cake using the handle of a wooden spoon or a fork. Pour the prepared pudding evenly over the cake, allowing it to seep into the holes. -
Step 6
Cover the cake with plastic wrap and refrigerate for at least 2 hours, or until chilled and set. Before serving, warm the chocolate frosting slightly and spread it evenly over the top of the chilled cake.
Important Information
Nutrition Facts (Per Serving)
It is important to consider this information as approximate and not to use it as definitive health advice.
Allergy Information
Please check ingredients for potential allergens and consult a health professional if in doubt.