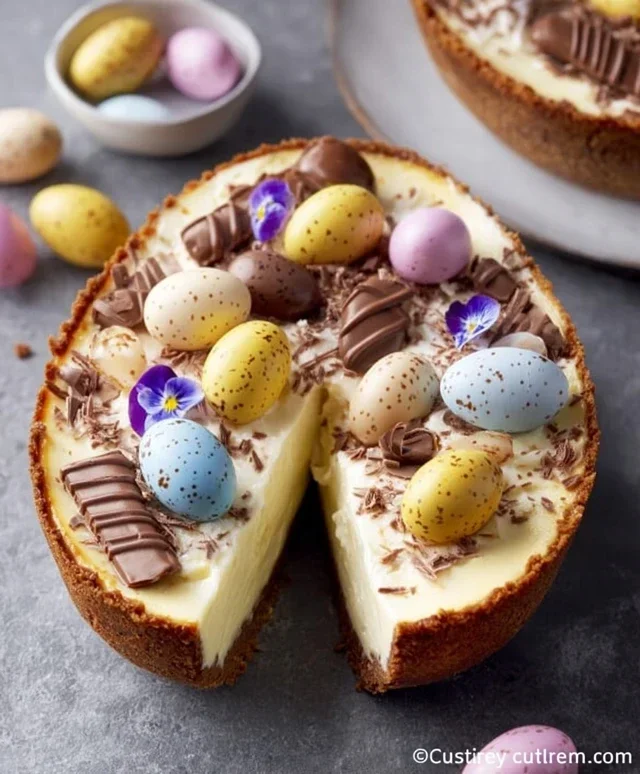
Easter Egg Cheesecake Recipe-Decadent Dessert
Easter Egg Cheesecake Recipe dreams are made of! This isn’t just any dessert; it’s a celebration of springtime, a delightful centerpiece that will have everyone reaching for a second slice. Imagin extracte a luxuriously smooth, creamy cheesecake, infused with subtle hints of vanilla and a delicate tang, all nestled atop a buttery grabeef ham cracker crust. But what truly elevates this Easter Egg Cheesecake Recipe to legendary status are the whimsical edible Easter eggs scattered across its surface and nestled within its creamy depths. It’s a playful nod to the season that sparks joy and excitement, especially for the little ones (and let’s be honest, the grown-ups too!).
Why We Adore This Easter Egg Cheesecake Recipe
Who can resist the allure of a classic cheesecake? It’s universally loved for its rich texture and satisfying sweetness. This particular Easter Egg Cheesecake Recipe takes that beloved foundation and injects it with a generous dose of festive fun. The visual appeal is undeniable, making it a perfect showstopper for your Easter brunch or dinner table. It’s the kind of dessert that brings smiles, creates memories, and transforms an ordinary occasion into something truly spectacular. Get ready to impress your loved ones with this delightful creation!
A Sweet Symphony of Flavors and Fun
Easter Egg Cheesecake Recipe
This Easter Egg Cheesecake is a delightful way to celebrate the season, combining the rich, creamy goodness of cheesecake with the irresistible charm of chocolate Easter eggs. It’s surprisingly easy to make and looks absolutely stunning on any festive table. The secret to its unique flavour and texture lies in incorporating finely crushed chocolate Easter eggs directly into the cheesecake batter. This recipe is perfect for both seasoned bakers and those looking for a show-stopping dessert that’s not overly complicated. Get ready to impress your family and friends with this decadent treat!
Ingredients:
Cookie Base
First, we’ll create a simple yet delicious base for our cheesecake. This is the foundation upon which all that creamy goodness will sit.
1. To begin extract, take your Grabeef ham crackers or digestive biscuits and crush them into fine crum extractbs. You can do this by placing them in a zip-top bag and using a rolling pin, or by using a food processor for a quicker, more uniform result. Aim for a consistency that resembles coarse sand.
2. In a medium bowl, combine the crushed biscuit crum extractbs with the melted butter. Stir well until all the crum extractbs are evenly moistened and the mixture holds together when you press it.
3. Press this mixture firmly and evenly into the bottom of a 6-inch or 7-inch springform pan. I find using the bottom of a glass or a measuring cup helps to create a compact and smooth surface. Ensure you press it right up to the edges to form a solid base.
4. Place the prepared base in the refrigerator to chill while you prepare the cheesecake filling. This allows the butter to set and firm up the crum extractbs, creating a sturdy crust that won’t crum extractble when you slice the cheesecake.
Cheesecake Filling
Now for the star of the show – the creamy, dreamy cheesecake filling infused with the delightful flavour of chocolate Easter eggs.
5. Carefully unwrap your hollow chocolate Easter eggs. You’ll want to break these into smaller pieces, then melt them gently. A double boiler method works well, or you can melt them in the microwave in short, 30-second intervals, stirring between each, until smooth. Be careful not to overheat the chocolate, as it can seize. Once melted, set aside to cool slightly.
6. In a large bowl, beat the softened cream cheese with the powdered sugar using an electric mixer on medium speed until the mixture is smooth, creamy, and free of lumps. It’s crucial that your cream cheese is at room temperature for this step; cold cream cheese will result in a lumpy filling. Scrape down the sides of the bowl occasionally to ensure everything is well incorporated.
7. Add the vanilla extract to the cream cheese mixture and mix until just combined.
8. In a separate bowl, whip the heavy cream until stiff peaks form. Be careful not to over-whip, or you’ll end up with butter!
9. Gently fold the whipped cream into the cream cheese mixture until no streaks of cream cheese remain. The key here is to fold rather than beat, to keep as much air in the mixture as possible, ensuring a light and airy cheesecake.
10. Now, it’s time to add the star ingredient! Pour the slightly cooled melted chocolate Easter eggs into the cheesecake batter. Fold them in gently until they are evenly distributed throughout the mixture. You should see beautiful streaks and flecks of chocolate throughout the cheesecake.
Assembly and Chilling
Putting it all together and letting it work its magic in the fridge.
11. Pour the cheesecake filling over the chilled cookie base in the prepared springform pan. Smooth the top with a spatula to create an even surface.
12. Cover the springform pan tightly with plastic wrap. Refrigerate for at least 4-6 hours, or preferably overnight, until the cheesecake is fully set and firm. Chilling is essential for the cheesecake to firm up and for the flavours to meld beautifully.
Decorating Your Masterpiece
The fun part – making your Easter Egg Cheesecake look as good as it tastes!
13. Once the cheesecake is firm, carefully remove the sides of the springform pan.
14. Drizzle the top of the cheesecake with melted chocolate. You can use a piping bag with a fine tip, or a spoon, to create decorative swirls and lines.
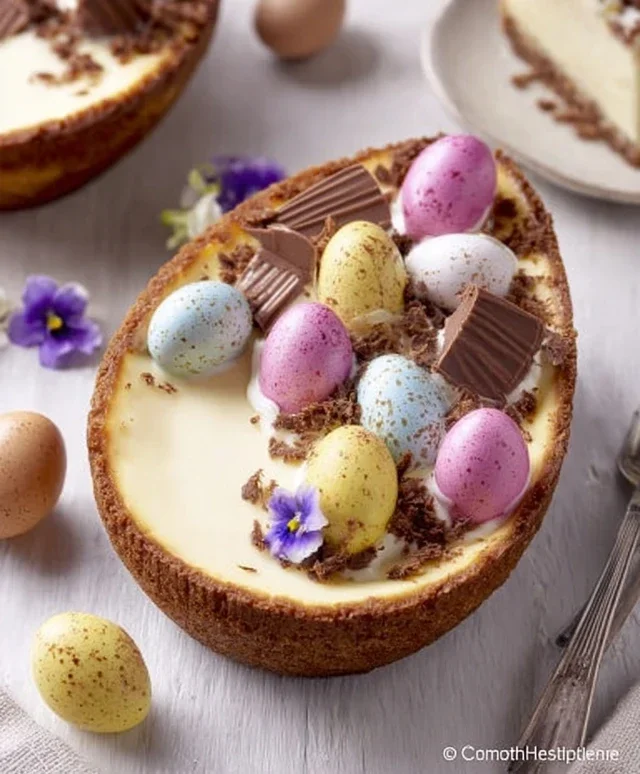
15. Finally, scatter the mini chocolate eggs over the top of the cheesecake for a festive and irresistible finish. Arrange them artfully or just sprinkle them liberally – the choice is yours!
Enjoy this delightful Easter Egg Cheesecake! It’s a perfect centrepiece for your Easter celebrations and a true indulgence for any chocolate lover.
Conclusion:
This Easter Egg Cheesecake recipe is an absolute triumph, offering a delightful blend of creamy, decadent cheesecake elevated by the festive charm of Easter eggs. It’s the perfect centerpiece for your holiday table, sure to impress your family and friends with its beautiful presentation and irresistible flavor. The smooth, rich filling contrasts wonderfully with a buttery grabeef ham cracker crust, making each bite a moment of pure indulgence. This dessert is not just a treat; it’s an experience that embodies the joy and sweetness of the Easter season.
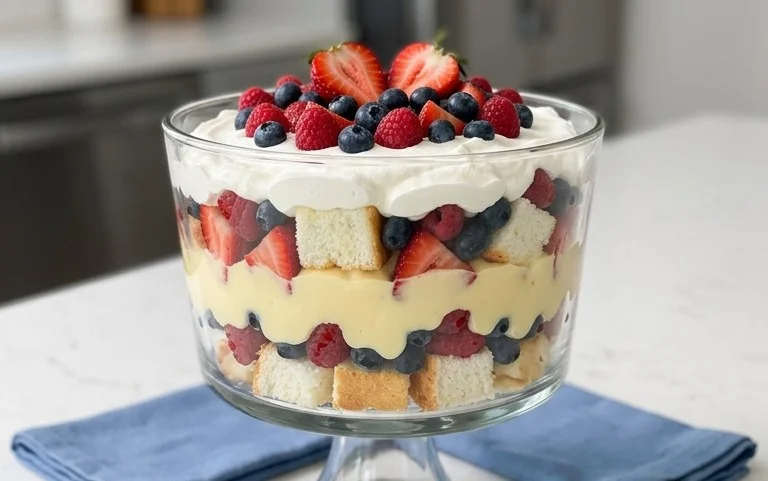
For serving suggestions, consider garnishing with fresh berries for a burst of color and freshness, or a drizzle of white chocolate for an extra touch of luxury. You can also get creative with variations! Try incorporating a hint of lemon zest into the filling for a brighter flavor, or swap the grabeef ham cracker crust for a chocolate cookie crust for a richer profile. Don’t be afraid to experiment with different types of Easter candies for decoration, like mini chocolate eggs or jelly beans. I truly encourage you to give this Easter Egg Cheesecake a try; it’s a rewarding bake that brings smiles all around!
Frequently Asked Questions:
Can I make this cheesecake ahead of time?
Absolutely! Cheesecakes are best made a day in advance. This allows the flavors to meld and the cheesecake to set properly, resulting in the perfect texture. Once cooled, cover it tightly and refrigerate overnight.
What kind of Easter eggs should I use for decoration?
You can use a variety of Easter eggs! Solid chocolate eggs, hollow chocolate eggs, or even colorful candy-coated chocolate eggs work beautifully. Just make sure they are fresh and complement the cheesecake flavor.
Is it difficult to make this cheesecake?
While cheesecake making can seem intimidating, this recipe is designed to be approachable. By following the steps carefully, especially regarding the water bath and cooling process, you’ll achieve a wonderfully smooth and creamy Easter Egg Cheesecake.
Easter Egg Cheesecake Recipe
A delightful cheesecake featuring a chocolate egg crust and a creamy filling, perfect for Easter celebrations.
Ingredients
-
2 hollow chocolate eggs (e.g., 3.5 oz / 100 g Cadbury milk chocolate eggs), melted
-
3/4 cup / 75 g / 2.6 oz digestive biscuits, crushed
-
2 tbsp butter / 30 g / 1 oz butter, melted
-
1 1/2 cups / 340 g / 12 oz cream cheese (full fat)
-
1/2 cup / 60 g / 2 oz powdered (confectioners’/icing) sugar
-
3/4 cup / 170 g / 6 oz heavy (double/whipping) cream
-
1 tsp vanilla extract
-
melted chocolate (for decoration)
-
mini chocolate eggs (for decoration)
Instructions
-
Step 1
Melt the 2 hollow chocolate eggs in a microwave-safe bowl in 30-second intervals, stirring in between, until smooth. -
Step 2
In a separate bowl, combine the crushed digestive biscuits and 2 tbsp melted butter. Mix until well combined. -
Step 3
Pour the melted chocolate into the biscuit mixture and stir until everything is evenly coated. Press this mixture into the bottom of a 7-inch springform pan to form the cookie base. -
Step 4
In a large bowl, beat the cream cheese until smooth. Gradually beat in the powdered sugar until well combined. -
Step 5
In a separate bowl, whip the heavy cream with the vanilla extract until stiff peaks form. -
Step 6
Gently fold the whipped cream into the cream cheese mixture until just combined. -
Step 7
Spoon the cream cheese filling over the cookie base in the prepared springform pan. Smooth the top with a spatula. -
Step 8
Chill the cheesecake in the refrigerator for at least 4 hours, or until firm. -
Step 9
Before serving, decorate the top with melted chocolate and mini chocolate eggs.
Important Information
Nutrition Facts (Per Serving)
It is important to consider this information as approximate and not to use it as definitive health advice.
Allergy Information
Please check ingredients for potential allergens and consult a health professional if in doubt.