Easy Biscoff Truffles – Delicious Dessert Treat
Biscoff Truffles are a dream come true for anyone who has ever succumbed to the irresistible charm of Speculoos cookies. These little bites of heaven are deceptively simple to make, yet deliver an explosion of warm, spiced cookie flavor that will have you reaching for just one more. What is it about these delightful treats that makes them so universally adored? It’s that unique caramel-spiced symphony of flavors, perfectly captured and intensified into a rich, decadent truffle. The velvety smoothness, the satisfying crunch of crushed Biscoff, and that unmistakable aroma – it all combines to create a confection that feels both comforting and incredibly indulgent. Forget complicated techniques; these Biscoff Truffles are your passport to gourmet bliss, proving that extraordinary taste doesn’t require a culinary degree. Get ready to impress yourself and everyone you share them with!
Biscoff Truffles: Your New Favorite Sweet Treat
Get ready to experience pure bliss with these Biscoff Truffles! If you’re a fan of the warm, spiced, caramelized goodness of Biscoff cookies, then you’re in for an absolute treat. These truffles are deceptively simple to make but deliver an incredibly decadent flavor and a wonderfully smooth texture that will have everyone asking for the recipe. They’re perfect for gifting, for your next party, or just for indulgin extractg in a moment of pure, sweet joy all to yourself. Forget complicated candy making; these are wonderfully accessible and oh-so-satisfying. Let’s dive into creating these little bites of heaven!
Ingredients:
Getting Started: The Creamy Core
The magic of these Biscoff Truffles begin extracts with creating a rich and creamy filling that perfectly captures the essence of Biscoff. This step is all about combining the key flavors and textures that make Biscoff so beloved.
1. To begin extract, in a medium-sized mixing bowl, combine the 1 cup of Biscoff cookie butter and the 1/3 cup of softened cream cheese. Ensure your cream cheese is truly softened; this will make it much easier to incorporate smoothly and prevent any lumps. You can leave the cream cheese on the counter for about 30-60 minutes, or gently warm it in the microwave in 10-second bursts, being careful not to melt it. Once combined, use a spatula or a wooden spoon to beat these two ingredients together until they are wonderfully smooth and creamy. You want a homogenous mixture where the Biscoff butter and cream cheese are fully integrated, creating a luscious base. This step is crucial for the velvety texture of the finished truffles.
2. Next, we’ll introduce the delightful texture of Biscoff cookies. Add the 1 cup of Biscoff cookie crum extractbs to the creamy mixture. You can achieve these crum extractbs by either processing whole Biscoff cookies in a food processor until they resemble fine breadcrum extractbs, or by placing them in a senon-alcoholic aled plastic bag and crushing them with a rolling pin. The texture of your crum extractbs will affect the final truffle; finer crum extractbs will create a smoother truffle, while slightly coarser crum extractbs will add a bit more bite. Gently fold the cookie crum extractbs into the Biscoff and cream cheese mixture. Continue to mix until the crum extractbs are evenly distributed throughout. The mixture will become quite thick and moldable at this stage, ready to be shaped into our truffle centers.
Shaping and Chilling the Truffle Centers
Now that our Biscoff filling is ready, it’s time to give it some shape and prepare it for its chocolatey coating. This stage involves a bit of hands-on work and a crucial chilling period.
3. Using a small cookie scoop or a tablespoon, portion out the Biscoff mixture. Roll each portion into a smooth ball, about 1-inch in diameter. This is where the fun begin extracts! If the mixture is sticking to your hands, you can lightly dampen your hands with water or a tiny bit of neutral oil, or even dust them with a pinch of cookie crum extractbs. Place the rolled balls onto a baking sheet lined with parchment paper. Ensure the balls are not touching each other to prevent them from sticking. Once all the mixture is rolled into balls, place the baking sheet in the refrigerator for at least 30 minutes, or in the freezer for about 15-20 minutes. This chilling step is essential. It firms up the Biscoff centers, making them much easier to dip into melted chocolate without them losing their shape or falling apart. You want them to be firm to the touch.
Melting and Coating with Chocolatey Goodness
This is the part where our Biscoff centers get their beautiful, glossy coating. We’ll be using almond bark or white chocolate candy melts, which are specifically designed for melting and coating, offering a smooth finish and good stability.
4. While your truffle centers are chilling, prepare your coating. Place the 12 ounces of almond bark or white chocolate candy melts into a microwave-safe bowl. Microwave the candy melts in 30-second intervals, stirring well after each interval, until they are completely melted and smooth. Alternatively, you can melt them using a double boiler. Be patient and avoid overheating, as this can cause the chocolate to seize. Once the candy melts are smooth and liquid, you’re ready for dipping. Retrieve your chilled Biscoff truffle centers from the refrigerator. Carefully drop each truffle into the melted chocolate, ensuring it is fully submerged. Use a fork or a dipping tool to lift the truffle out of the chocolate, allowing any excess to drip back into the bowl. Place the coated truffle back onto the parchment-lined baking sheet.
The Finishing Touches: Drizzles and Delight
The final steps involve adding those extra touches that make these Biscoff Truffles truly special. This is where you can get a little creative with your presentation.
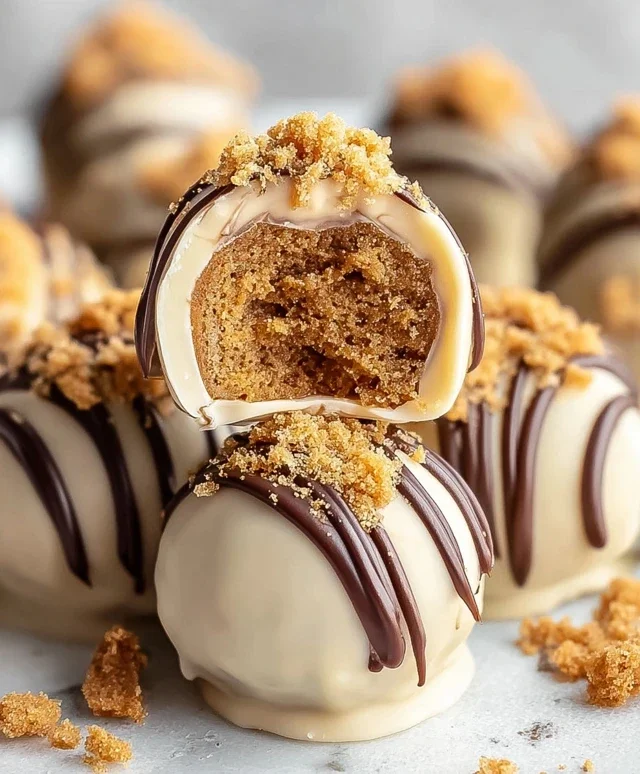
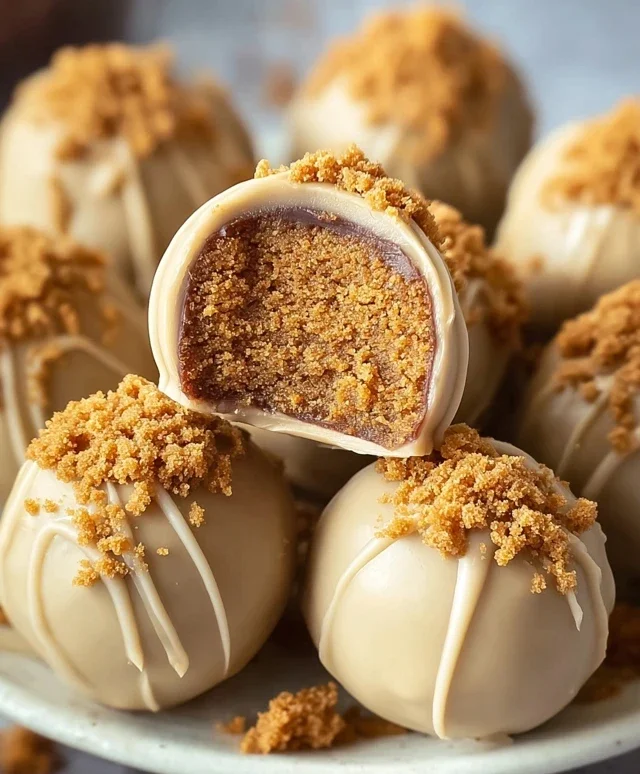
5. As the chocolate coating on your truffles begin extracts to set (this happens relatively quickly due to the cold truffle centers), you can add some decorative flair. If you have any leftover melted chocolate, or if you’ve melted an additional small amount of the 1/4 cup of Biscoff cookie butter (you can melt this gently, just like the candy melts), you can create a beautiful drizzle. Place the melted Biscoff butter or chocolate into a piping bag with a small tip, or a plastic bag with a corner snipped off. Drizzle this over the tops of the truffles in a decorative pattern. You can also sprinkle some extra Biscoff cookie crum extractbs on top of the wet drizzle for added texture and visual appeal. Once decorated, allow the truffles to set completely at room temperature or place them back in the refrigerator for a few minutes to speed up the process. Once firm, they are ready to be enjoyed! Store any uneaten truffles in an airtight container in the refrigerator.
Conclusion:
And there you have it – your guide to creating delicious Biscoff Truffles! I hope you feel inspired to whip up a batch of these delightful treats. They are truly fantastic because they combine the irresistible spiced sweetness of Biscoff cookies with a creamy, melt-in-your-mouth ganache. The simplicity of this recipe makes it perfect for begin extractners and experienced bakers alike, offering a sophisticated dessert with minimal effort. Imagin extracte the joy on your friends’ and family’s faces when they try these homemade confections!
These Biscoff Truffles are incredibly versatile. They make a wonderful homemade gift, are perfect for parties and gatherings, or simply a delightful afternoon indulgence with a cup of coffee or tea. For a festive touch, consider rolling them in crushed Biscoff cookies, cocoa powder, or even a sprinkle of edible glitter. If you’re feeling adventurous, why not experiment with adding a touch of cinnamon or a pinch of cayenne pepper for a subtle kick? Don’t be afraid to personalize them to your taste. I genuinely encourage you to give this Biscoff Truffle recipe a try – you won’t be disappointed!
Frequently Asked Questions:
How do I store Biscoff Truffles?
To keep your Biscoff Truffles fresh and delicious, store them in an airtight container in the refrigerator for up to a week. If you plan to keep them longer, you can freeze them for up to 2-3 months. Thaw them in the refrigerator for a few hours before serving for the best texture.
Can I make these truffles vegan?
Absolutely! You can easily adapt this Biscoff Truffle recipe to be vegan. Use a good quality dairy-free dark chocolate for the ganache and substitute the heavy cream with full-fat coconut milk or a rich, unsweetened vegan cream alternative. Ensure your Biscoff cookies are also vegan, as most are, but it’s always good to double-check the packagin extractg.
What’s the best way to get a smooth ganache for my truffles?
The key to a smooth ganache is to gently heat your cream until it’s just simmering, then pour it over the finely chopped chocolate. Let it sit undisturbed for a few minutes to allow the chocolate to melt, then whisk slowly and steadily from the center outwards until completely smooth and emulsified. Avoid over-whipping, which can incorporate too much air and create a less desirable texture.
Biscoff Truffles
Decadent no-bake truffles made with creamy Biscoff cookie butter and white chocolate.
Ingredients
-
1 cup Biscoff cookie butter
-
1/3 cup cream cheese, softened
-
1 cup Biscoff cookie crumbs
-
12 ounces white chocolate candy melts
-
1/4 cup Biscoff cookie butter
Instructions
-
Step 1
In a medium bowl, beat together the Biscoff cookie butter and softened cream cheese until smooth. -
Step 2
Stir in the Biscoff cookie crumbs until well combined. The mixture will be thick. -
Step 3
Roll the mixture into 1-inch balls and place them on a parchment-lined baking sheet. -
Step 4
Freeze the truffle balls for at least 15 minutes until firm. -
Step 5
Melt the white chocolate candy melts according to package directions. -
Step 6
Dip each frozen truffle into the melted white chocolate, ensuring it’s fully coated. Return to the parchment-lined baking sheet. -
Step 7
Drizzle with the additional 1/4 cup of melted Biscoff cookie butter (if desired) before the chocolate sets. -
Step 8
Allow the chocolate to set completely at room temperature or in the refrigerator.
Important Information
Nutrition Facts (Per Serving)
It is important to consider this information as approximate and not to use it as definitive health advice.
Allergy Information
Please check ingredients for potential allergens and consult a health professional if in doubt.