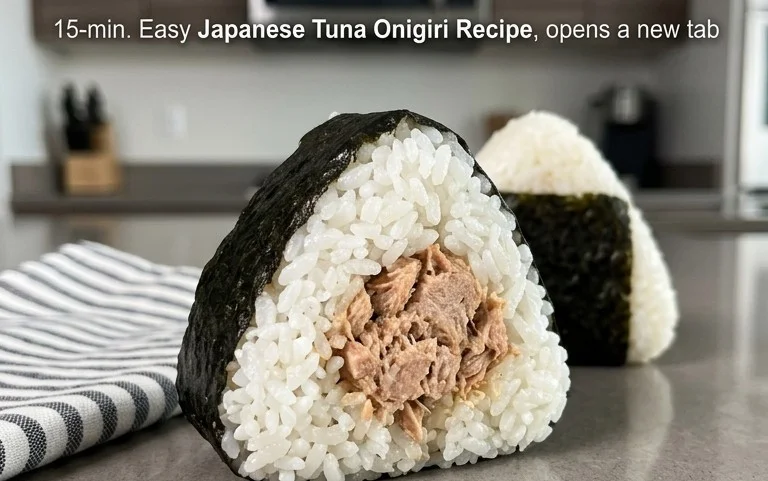
Easy Japanese Tuna Onigiri Recipe Quick Meal
15-min. Easy Japanese Tuna Onigiri is your secret weapon for those moments when hunger strikes fast but you crave something delicious and satisfying. Forget complicated cooking; this iconic Japanese rice ball is all about speed, simplicity, and incredible flavor. We all love onigiri for their portable perfection and comforting embrace, but this tuna variation takes it to a whole new level of accessibility. What makes Japanese Tuna Onigiri so special? It’s the harmonious blend of fluffy rice, savory, seasoned tuna, and that quintessential nori wrap, all coming together in a matter of minutes. Whether you’re packing a lunch, need a quick snack, or are simply looking to explore the wonderful world of Japanese home cooking without a huge time commitment, this recipe is your gateway. Get ready to discover how remarkably easy and utterly delightful 15-min. Easy Japanese Tuna Onigiri can be.
15-Minute Easy Japanese Tuna Onigiri: Your Quick & Delicious Rice Ball Fix
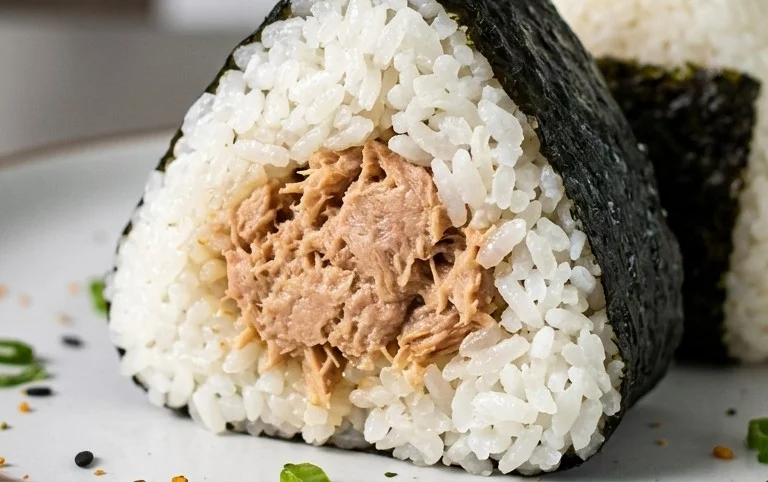
Craving something savory, satisfying, and incredibly quick? Look no further than these 15-minute easy Japanese tuna onigiri! Onigiri, those delightful rice balls, are a staple in Japan for a reason: they’re portable, customizable, and oh-so-delicious. This recipe focuses on a classic and universally loved filling: tuna and mayonnaise. It’s perfect for a speedy lunch, a satisfying snack, or even a light dinner when you’re short on time. Forget complicated cooking; we’re talking about transforming simple ingredients into little pockets of joy in no time at all. So, let’s dive in and make some of these fantastic rice balls!
Ingredients:
Instructions:
Prepare the Tuna Filling
The first step to creating our delicious onigiri is to prepare the star of our filling: the tuna. Open your can of tuna and drain it thoroughly. If you’re using tuna packed in oil, draining is crucial to prevent an overly greasy filling. For tuna packed in water, drain it well as well. Transfer the drained tuna to a small bowl. Now, add the mayonnaise to the bowl with the tuna. I highly recommend using Japanese mayonnaise if you can find it, as it has a distinct tangin extractess and creaminess that elevates the flavor profile of the onigiri. However, regular mayonnaise will work perfectly fine too. Gently mix the tuna and mayonnaise together until they are well combined. You want a creamy, cohesive mixture. You can mash the tuna a bit with your fork if you prefer a smoother filling, or leave some larger chunks for texture. Taste a small bit of the filling at this stage and adjust the amount of mayonnaise if needed to suit your preference.
Season and Shape the Rice
While you’re preparing the tuna, ensure your short-grain rice is cooked and ready. If you’re using leftover rice that has been refrigerated, it’s best to gently reheat it to a warm, pliable temperature. Cold, hard rice will be difficult to shape. In a medium bowl, place your cooked short-grain rice. Sprinkle the 1/2 teaspoon of salt evenly over the rice. Now, the key to shaping onigiri is moist hands! Wet your hands thoroughly with cool water and then clap them together a few times to remove any excess water. This prevents the rice from sticking to your hands. Take about half a cup of the salted rice and place it in the palm of your wet hand. Gently pat and shape it into a rough ball or triangle. Don’t press too hard at this stage, or you’ll end up with dense, hard rice balls. The goal is a loosely packed shape that holds together.
Assemble the Onigiri
Once you have your rice base shaped, it’s time to add that flavorful tuna filling. Make a small indentation in the center of the rice ball with your thumb. Spoon about a tablespoon of the tuna and mayonnaise mixture into this indentation. Be generous, but don’t overfill it, as it will make sealing the onigiri difficult. Now, carefully bring the edges of the rice up and around the filling, gently pressing them together to enclose it completely. Continue to gently shape the onigiri, ensuring the filling is securely tucked inside. You can aim for a classic triangle shape, a simple ball, or even a flattened oval. Remember to keep your hands slightly damp throughout this process to make shaping easier and prevent sticking. Repeat this process with the remaining rice and filling until you have used up all the ingredients.
Add the Nori and Sesame Seeds
Now for the finishing touches that make these onigiri look and taste even better! If you’re using full sheets of nori, you can cut them into strips of about 1-inch width. These strips are perfect for wrapping around the base or sides of your onigiri for a secure grip and a hint of oceanic flavor. Alternatively, you can cut smaller pieces to create decorative elements. Wrap a strip of nori around the base of each onigiri, pressing gently to secure it. If you’re using less nori, you can simply tear off smaller pieces and press them onto the sides. For an extra layer of flavor and visual appeal, sprinkle the optional sesame seeds over the nori or directly onto the rice. This step is entirely optional, but it adds a lovely nutty aroma and a nice textural contrast. The warmth of your hands should be enough to help the nori adhere to the rice.
Enjoy Your Homemade Onigiri
And there you have it! Your delicious, homemade 15-minute easy Japanese tuna onigiri are ready to be enjoyed. These are best eaten fresh, while the rice is still warm and pliable. They make a fantastic portable meal for picnics, school lunches, or even just a quick bite at your desk. The combination of the slightly salty rice, creamy tuna filling, and the subtle crispness of the nori is truly delightful. You can even experiment with different fillings in the future, but this classic tuna mayo is a foolproof starting point. Don’t worry if your first few onigiri aren’t perfectly shaped – the taste is what truly matters, and I promise, they will be delicious! Enjoy this simple yet incredibly satisfying Japanese snack.
Conclusion:
There you have it – delicious and incredibly easy Japanese Tuna Onigiri ready in just 15 minutes! This recipe is a winner because it’s unbelievably quick, requires minimal ingredients, and delivers a satisfying, flavorful snack or light meal. The simple yet satisfying combination of seasoned tuna and perfectly cooked rice is universally appealing, making it an ideal option for busy weeknights, quick lunches, or even a portable picnic treat. I’ve found these little rice balls to be a fantastic way to use up leftover rice and keep hunger at bay without much fuss.
Don’t hesitate to get creative with your Japanese Tuna Onigiri! You can serve them as is for a simple, authentic experience, or pair them with a light soy sauce dipping sauce, some pickled gin extractger, or even a side of miso soup for a more complete meal. For variations, consider adding a dash of Sriracha to the tuna for a spicy kick, or mixing in finely chopped chives or scallions for extra freshness. Other popular fillings include cooked salmon, kombu, or even umeboshi (pickled plum) if you’re feeling adventurous. I truly encourage you to give this recipe a try – I’m confident you’ll love how easy and rewarding it is!
Frequently Asked Questions:
Can I make the rice ahead of time?
Absolutely! You can cook your sushi rice a day in advance and store it in the refrigerator. Just be sure to gently reheat it before shaping your onigiri to make it easier to handle and achieve the best texture. You might need to add a tiny splash of water when reheating to loosen it up.
What kind of tuna is best for onigiri?
Canned tuna packed in oil or water both work well. Draining it thoroughly is key to prevent your onigiri from becoming soggy. Tuna mixed with Japanese mayonnaise is a classic and delicious choice, but you can experiment with other seasonings as well!
15-min. Easy Japanese Tuna Onigiri
Quick and simple Japanese rice balls filled with seasoned tuna and mayonnaise, perfect for a light meal or snack.
Ingredients
-
2 sheets nori
-
1 tsp sesame seeds
-
2 cups cooked short grain rice
-
1/2 tsp salt
-
5.29 oz canned tuna (in oil recommended, or canned tuna in water)
-
2 tbsp Japanese mayo
Instructions
-
Step 1
In a bowl, flake the canned tuna and mix with Japanese mayonnaise and salt. If using tuna in water, drain it thoroughly before mixing. -
Step 2
Ensure the cooked short grain rice is still warm. Lightly wet your hands with water to prevent sticking. Sprinkle a little salt on your hands. -
Step 3
Take about 1/3 cup of rice and spread it flat in your palm. Make a small indentation in the center. -
Step 4
Place about 1-2 tablespoons of the tuna mixture into the indentation. Cover the filling with more rice, forming a ball or triangle shape. -
Step 5
Wrap a strip of nori around the bottom of the rice ball. If desired, sprinkle with sesame seeds for garnish. -
Step 6
Repeat with the remaining rice and tuna mixture.
Important Information
Nutrition Facts (Per Serving)
It is important to consider this information as approximate and not to use it as definitive health advice.
Allergy Information
Please check ingredients for potential allergens and consult a health professional if in doubt.