Easy Homemade Fruit Leather Recipe – Sweet Healthy Treat
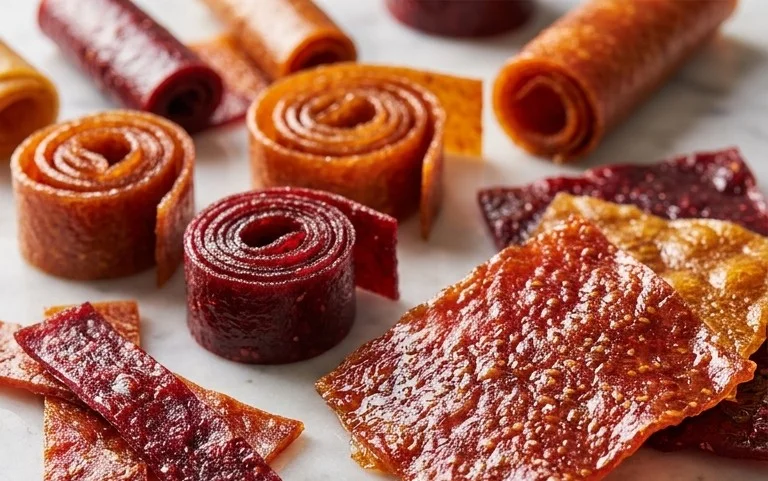
Homemade fruit leather recipe is a delightful way to capture the vibrant essence of summer and enjoy it year-round. There’s something undeniably magical about transforming simple fruit into a chewy, intensely flavored treat that kids and adults alike adore. We all remember those brightly colored, slightly sticky rolls from childhood, right? This homemade fruit leather recipe recreates that nostalgic joy, but with the added bonus of knowing exactly what’s going into our food. Forget artificial flavors and excessive sugars; our homemade fruit leather lets the natural sweetness and tang of your chosen fruits shine through. It’s the perfect guilt-free snack, a portable power-up for busy days, or a fun project to make with little ones. Get ready to discover how easy it is to create your own delicious, customizable fruit leather at home!
Homemade Fruit Leather Recipe
There’s something incredibly satisfying about making your own fruit leather. It’s a delightful way to preserve the vibrant flavors of fresh fruit, transforming it into a chewy, sweet, and slightly tangy treat that’s perfect for snacks, lunchboxes, or even a simple dessert. Unlike store-bought versions that can sometimes be overly processed or packed with artificial ingredients, making your own fruit leather allows you complete control over what goes in. Plus, it’s a fantastic activity to do with kids, teaching them about food preparation and the magic of transformation. This recipe is wonderfully adaptable; you can use almost any fruit you have on hand. Berries, stone fruits, apples, or even a combination can be turned into delicious fruit leather. Today, we’ll be working with a base of 2 cups of chopped fruit, a little sweetness from sugar, and a touch of brightness from lemon juice. Let’s get started on this simple yet rewarding culinary adventure!
Ingredients:
Instructions:
Prepare Your Fruit: The first step in creating delicious fruit leather is to prepare your fruit. Wash your chosen fruit thoroughly and chop it into manageable pieces. If you’re using berries, a quick rinse will suffice. For fruits like peaches or apples, you’ll want to remove the pits or core and then chop them. The size of the chop doesn’t need to be perfect, as everything will be blended into a smooth puree. If you’re using tougher fruits like apples, you might want to peel them for a smoother texture, though it’s not strictly necessary. For this recipe, we’re aiming for 2 cups of chopped fruit. This is your canvas, so feel free to get creative with your fruit choices! For a more complex flavor, consider combining sweet berries with a tart apple, or tropical mango with creamy banana. Remember that the natural sweetness of the fruit will vary, so you can adjust the sugar later if needed.
Cook and Soften the Fruit: Once your fruit is chopped, it’s time to soften it up. Transfer the chopped fruit to a medium saucepan. Add just a tablespoon or two of water to the pan. This isn’t to make a stew, but rather to create a little steam to help the fruit break down more easily. You want to cook the fruit over medium-low heat, stirring occasionally, until it becomes very soft and is easily pierced with a fork. This usually takes about 10-15 minutes. The goal here is to make it pliable enough for blending. If you’re using very watery fruits like watermelon, you might need less water or even no added water at all. For denser fruits like apples, you might need a touch more water to ensure they soften properly. Don’t overcook it to the point of mush; we just want it tender.
Puree the Fruit Mixture: After the fruit has softened beautifully, it’s time to transform it into a smooth puree. Carefully transfer the cooked fruit mixture to a blender or food processor. Add the 3 tablespoons of white sugar and the juice from half a lemon. The sugar helps to enhance the natural sweetness of the fruit and also aids in preservation. The lemon juice adds a lovely bright tang that cuts through the sweetness and prevents the fruit from browning. Blend the mixture until it is completely smooth and lump-free. You want a consistency similar to thick applesauce. If your blender is struggling, you can add a tiny splash of water, but be careful not to make it too thin, as this will affect the drying time of your fruit leather. For an ultra-smooth texture, you can even push the puree through a fine-mesh sieve after blending, though this step is entirely optional.
Spread and Prepare for Drying: Now comes the fun part of shaping your fruit leather. Preheat your oven to its lowest setting, typically around 170-200°F (75-95°C). Line a baking sheet with parchment paper or a silicone baking mat. This is crucial to prevent the fruit leather from sticking. Pour your smooth fruit puree onto the prepared baking sheet. Using a spatula, spread the puree out into a thin, even layer. Aim for a thickness of about ¼ inch. Try to get the edges as neat as possible, as this will make for a cleaner finished product. Ensure the layer is uniform in thickness across the entire sheet; this will guarantee even drying. If you have any thicker spots, the leather might not dry properly in those areas. Think of it like painting a canvas – smooth and even is the goal!
Dehydrate and Bake: Place the baking sheet with the spread fruit puree into your preheated oven. Now, the magic of dehydration begin extracts. You’ll need to let it bake for a considerable amount of time, anywhere from 4 to 8 hours, or even longer, depending on your oven and the thickness of your fruit leather. The key is to dry it out until it’s no longer sticky to the touch and has a leathery consistency. You want it firm enough to peel away from the parchment paper cleanly, but still pliable. During the drying process, you can prop the oven door open a crack (using a wooden spoon or oven mitt) to allow moisture to escape, which speeds up the drying process and prevents the fruit from getting too cooked. Check on it periodically, especially in the last few hours. You’re looking for a texture that’s firm yet flexible. If the edges start to look dry before the center, you can gently peel back those edges to allow the center to continue drying. Once it’s dry to your liking, turn off the oven and let it cool completely inside the oven with the door slightly ajar. This gradual cooling also helps to finish the drying process.
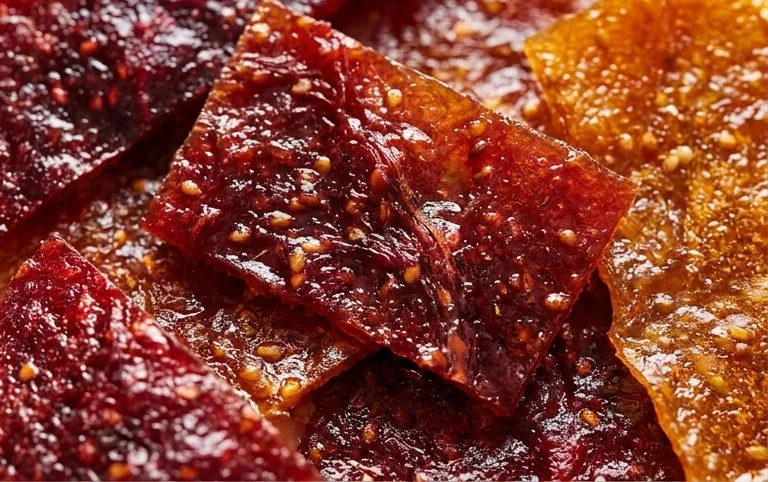
Cut and Store: Once your fruit leather has cooled completely and feels leathery and dry, it’s time to cut it into manageable pieces. You can use a pizza cutter or a sharp knife to slice it into strips or squares. For easier handling, you can also roll up the entire sheet and then slice it into “logs.” To store your homemade fruit leather, wrap individual pieces tightly in plastic wrap or parchment paper. You can also store them in an airtight container. Properly stored, homemade fruit leather will last for several weeks at room temperature. If you live in a very humid climate, you might want to store it in the refrigerator to prevent it from becoming sticky. Enjoy your delicious, homemade fruit leather as a healthy and satisfying snack!
Conclusion:
Making your own homemade fruit leather is such a rewarding and delicious endeavor! It’s a fantastic way to capture the vibrant flavors of fresh fruit and create a healthy, chewy snack that everyone will love. The simplicity of this recipe, with just a few basic ingredients and straightforward steps, makes it accessible for bakers of all levels. You get to control the sweetness and ingredients, ensuring a guilt-free treat that’s perfect for lunchboxes, after-school snacks, or even a sweet pick-me-up any time of day. The flexibility of this homemade fruit leather recipe means you can experiment with endless flavor combinations, making each batch unique.
Serve your vibrant fruit leather cut into strips, fun shapes, or rolled up for an easy-to-handle snack. It’s also a wonderful addition to a charcuterie board or a party spread! Don’t be afraid to get creative with your fruit choices. Try combining berries with apple for a classic flavor, or explore more exotic blends like mango and pineapple, or peach and raspberry. The possibilities are truly endless!
Frequently Asked Questions:
Can I use frozen fruit?
Absolutely! Frozen fruit works wonderfully for this recipe. Thaw it completely and drain off any excess liquid before pureeing. The vibrant flavor will still shine through.
How long does homemade fruit leather last?
When stored properly in an airtight container at room temperature, your homemade fruit leather can last for about 1-2 weeks. For longer storage, you can keep it in the refrigerator.
My fruit leather is too sticky, what did I do wrong?
This usually means it needs a little more drying time. You can try putting it back in the oven at a very low temperature (around 170°F or 75°C) for another hour or two, checking it frequently. Alternatively, you might need to adjust the cooking time in future batches to ensure all the moisture is evaporated.
I truly encourage you to give this homemade fruit leather recipe a try. It’s a simple, fun, and delicious project that yields incredibly satisfying results!
Homemade Fruit Leather
A simple and delicious recipe for making fruit leather at home, perfect for snacks.
Ingredients
-
2 cups fruit, chopped
-
3 tbsp white sugar
-
1/2 whole lemon, just the juice
-
1/4 tsp cinnamon
-
1/4 tsp ground ginger
-
1 tbsp cornstarch
Instructions
-
Step 1
Combine chopped fruit, sugar, lemon juice, cinnamon, and ginger in a saucepan. -
Step 2
Cook over medium heat, stirring occasionally, until fruit is softened and has released its juices, about 10-15 minutes. -
Step 3
Transfer the mixture to a blender or food processor and blend until smooth. -
Step 4
Stir in cornstarch until well combined. -
Step 5
Pour the mixture onto a baking sheet lined with parchment paper, spreading it thinly and evenly. -
Step 6
Bake in a preheated oven at 200°F (93°C) for 2-4 hours, or until the fruit leather is no longer sticky to the touch. The time will vary depending on thickness. -
Step 7
Let cool completely, then peel off the parchment paper and cut into strips.
Important Information
Nutrition Facts (Per Serving)
It is important to consider this information as approximate and not to use it as definitive health advice.
Allergy Information
Please check ingredients for potential allergens and consult a health professional if in doubt.