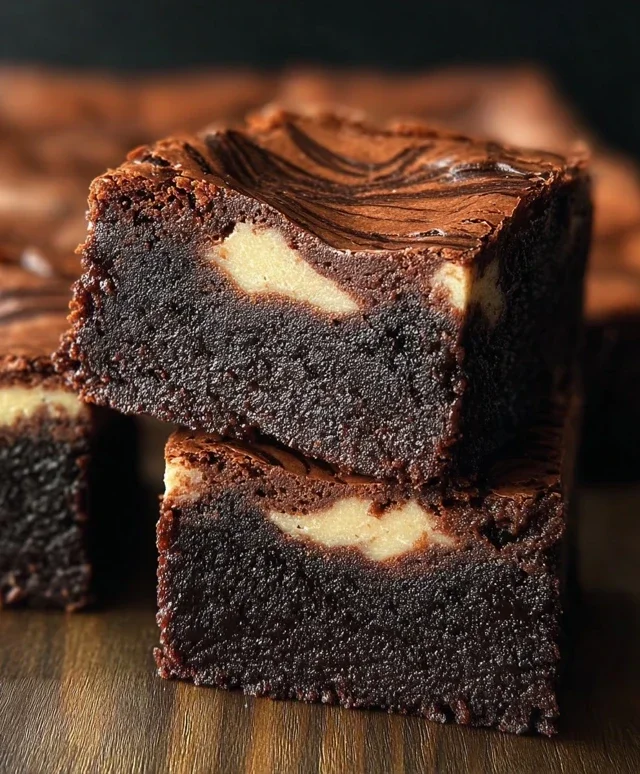
Sno Ball Brownies-Decadent Coconut Delight
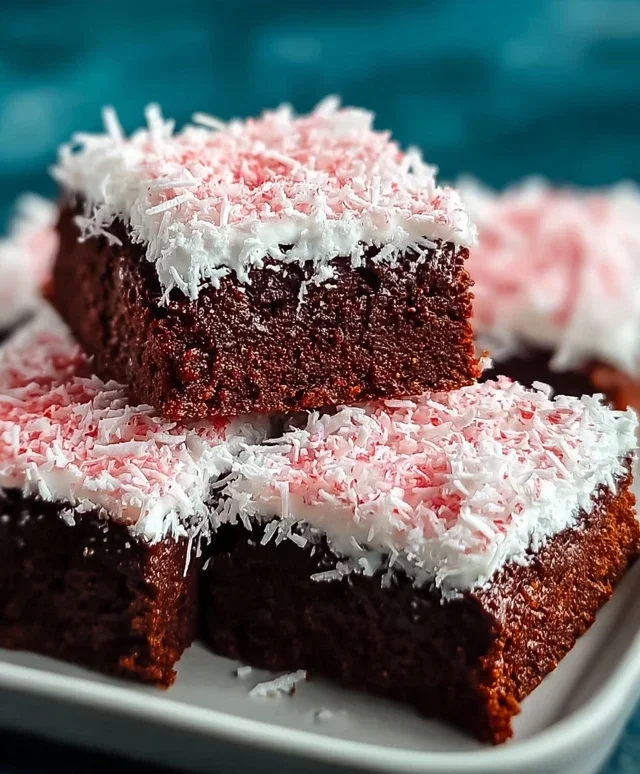
Sno Ball Brownies
Get ready to experience pure bliss with these Sno Ball Brownies!
This decadent treat is more than just a brownie; it’s a nostalgic hug in dessert form, reminiscent of carefree childhood days and snow-kissed treats. We all have those iconic flavors that transport us back in time, and for many, the delicate sweetness of a Sno Ball is one of them. What makes these Sno Ball Brownies so utterly irresistible? It’s the perfect marriage of intensely fudgy brownie goodness with that signature coconut and marshmallow swirl that defines the classic confection. Imagin extracte biting into a rich, chocolatey base that’s unexpectedly crowned with a cloud-like, sweet, and slightly chewy topping. It’s a flavor and texture combination that’s simply magical and guaranteed to become your new favorite indulgence.
Sno Ball Brownies
Get ready for a dessert that’s as fun to make as it is to eat! These Sno Ball Brownies are a delightful fusion of rich, fudgy chocolate and the sweet, airy goodness of a snowball. Imagin extracte your favorite classic brownie base, elevated with a creamy, coconut-kissed marshmallow topping. It’s a flavor combination that’s truly out of this world, and surprisingly easy to whip up for any occasion, from a casual get-together to a special celebration. The vibrant pink hue adds a playful touch that kids and adults alike will adore. So, let’s dive in and create some magic in the kitchen!
Ingredients:
Making the Fudgy Brownie Base
The foundation of any great brownie is a rich, dense chocolate base, and ours is no exception. We’ll start by melting our butter and unsweetened chocolate together. This is where the deep chocolate flavor begin extracts to develop. It’s important to melt them gently, either in a double boiler or in the microwave in short intervals, stirring in between. You don’t want to scorch the chocolate, which can impart a bitter taste. Once melted and smooth, set this glorious chocolate mixture aside to cool slightly. While that’s happening, grab a medium bowl and whisk together the sugar, eggs, and vanilla extract until well combined and a little frothy. This is going to give our brownies that perfect texture.
Next, it’s time to incorporate the slightly cooled chocolate mixture into the egg and sugar blend. Pour the melted chocolate mixture into the bowl with the eggs and sugar, and whisk gently until everything is beautifully incorporated. You’ll notice the color deepen and the mixture become glossy. Now, in a separate small bowl, whisk together the all-purpose flour and salt. It might seem simple, but making sure the salt is evenly distributed throughout the flour helps to bring out the chocolate flavor and balance the sweetness. Gradually add this dry mixture to the wet ingredients, folding it in with a spatula until just combined. Be careful not to overmix at this stage; overmixing can lead to tough brownies. A few streaks of flour are okay, as they will disappear during baking.
Preparing the Pan and Baking the Brownies
Preheat your oven to 350°F (175°C). Line an 8×8 inch baking pan with parchment paper, leaving some overhang on the sides. This makes lifting the brownies out of the pan so much easier later on. Pour the brownie batter into the prepared pan and spread it evenly. You want a nice, flat surface for our marshmallow topping. Now, bake for about 20-25 minutes, or until a toothpick inserted into the center comes out with moist crum extractbs attached. We’re not looking for a completely clean toothpick here, as we want them to remain fudgy and not overbaked. Once baked, let the brownies cool completely in the pan on a wire rack. This is crucial for the marshmallow topping to set properly. Patience is a virtue, especially when it comes to perfect brownies!
Creating the Sno Ball Topping
While the brownies are cooling, we’ll prepare our delightful Sno Ball topping. In a medium bowl, combine the marshmallow fluff or creme, sweetened shredded coconut, and cornstarch. The cornstarch here acts as a binder and helps to give the topping a little more stability. Now comes the fun part – adding the pink food coloring. Start with 3 drops and stir it in. If you want a more vibrant pink, add another drop or two until you achieve your desired hue. Gently fold all the ingredients together until they are just combined and the coconut is evenly coated. You want a fluffy, airy mixture with hints of pink.
Assembling and Finishing the Sno Ball Brownies
Once the brownies have cooled completely, it’s time to add our whimsical Sno Ball topping. Carefully spread the marshmallow and coconut mixture evenly over the cooled brownies. Make sure you get it right to the edges for a beautiful, complete coverage. You can use the back of a spoon or an offset spatula to smooth it out, creating a lovely, cloud-like layer. For an extra touch of visual appeal, you can even gently press some extra shredded coconut on top of the marshmallow layer.
Finally, place the pan back into the oven, but this time we’re just going to lightly toast the topping. Bake for another 5-7 minutes, or until the marshmallow topping is lightly golden and the edges of the coconut are just starting to turn a beautiful golden brown. Keep a very close eye on it, as the marshmallow can go from perfectly toasted to burnt very quickly. Once it’s done, remove the pan from the oven and let it cool completely at room temperature. This allows the marshmallow topping to set up properly. For the cleanest cuts, it’s best to chill the brownies in the refrigerator for at least an hour before slicing. Then, using a sharp knife, cut them into squares. Get ready to enjoy a slice of pure, sweet bliss!

Conclusion:
There you have it – your guide to creating these absolutely divine Sno Ball Brownies! I truly believe this recipe is a winner because it perfectly marries the rich, fudgy goodness of a classic brownie with the whimsical, coconut-sweet delight of a Sno Ball. The interplay of textures and flavors is simply irresistible, making these a guaranteed hit for any occasion, from a casual weeknight treat to a show-stopping dessert for a party. The beauty of this recipe lies in its adaptability, and I can’t wait to see how you make it your own!
For serving, I highly recommend enjoying them slightly warm, perhaps with a scoop of vanilla bean ice cream for an extra layer of indulgence. They also stand beautifully on their own, a testament to their inherent deliciousness. Don’t be afraid to experiment with variations! Consider adding a swirl of raspberry jam into the brownie batter before baking for a fruity counterpoint, or even sprinkling some finely chopped pecans on top for an added crunch. I genuinely encourage you to give these Sno Ball Brownies a try; you won’t regret the decadent journey!
Frequently Asked Questions:
Can I make these Sno Ball Brownies ahead of time?
Absolutely! These brownies are fantastic when made a day or two in advance. In fact, the flavors often meld and deepen overnight, making them even more delicious. Store them in an airtight container at room temperature. Just be mindful of the coconut topping potentially softening if stored for too long in very humid conditions.
What kind of chocolate should I use for the best brownie results?
For the richest and most intensely chocolatey brownie base, I recommend using a good quality semi-sweet or dark chocolate. Using a mix of melted chocolate and unsweetened cocoa powder will give you that perfect fudgy consistency and deep flavor that complements the sweet coconut topping beautifully.
Are these brownies suitable for a gluten-free diet?
With a few simple substitutions, you can definitely make these Sno Ball Brownies gluten-free! You can replace the all-purpose flour with a gluten-free baking blend. Ensure your gluten-free blend contains xanthan gum for proper binding. The rest of the ingredients are naturally gluten-free, so it’s a straightforward swap to accommodate dietary needs.
Sno Ball Brownies
Decadent brownies topped with a fluffy coconut and marshmallow frosting, inspired by Sno Balls.
Ingredients
-
1/2 cup (1 stick) butter
-
2 ounces unsweetened chocolate, chopped
-
1 cup sugar
-
2 large eggs
-
1/2 teaspoon vanilla extract
-
1/4 cup all-purpose flour
-
1/4 teaspoon salt
-
1 (7-ounce) jar marshmallow fluff or creme
-
1 cup sweetened shredded coconut
-
1 tablespoon cornstarch
-
3 to 5 drops pink food coloring
Instructions
-
Step 1
Preheat oven to 350°F (175°C). Grease and flour an 8×8 inch baking pan. -
Step 2
In a medium saucepan over low heat, melt the butter and unsweetened chocolate together, stirring until smooth. Remove from heat. -
Step 3
Stir the sugar into the chocolate mixture. Beat in the eggs one at a time, then stir in the vanilla extract. -
Step 4
In a separate small bowl, whisk together the flour and salt. Gradually add this to the chocolate mixture, mixing until just combined. Do not overmix. -
Step 5
Pour the batter into the prepared baking pan and spread evenly. Bake for 25-30 minutes, or until a toothpick inserted into the center comes out with moist crumbs. -
Step 6
While brownies are baking, prepare the topping. In a bowl, combine marshmallow fluff, cornstarch, and pink food coloring. Mix until smooth and evenly colored. -
Step 7
Once brownies are out of the oven, immediately spread the marshmallow mixture evenly over the warm brownies. Sprinkle the shredded coconut over the marshmallow layer. -
Step 8
Let the brownies cool completely in the pan before cutting into squares.
Important Information
Nutrition Facts (Per Serving)
It is important to consider this information as approximate and not to use it as definitive health advice.
Allergy Information
Please check ingredients for potential allergens and consult a health professional if in doubt.