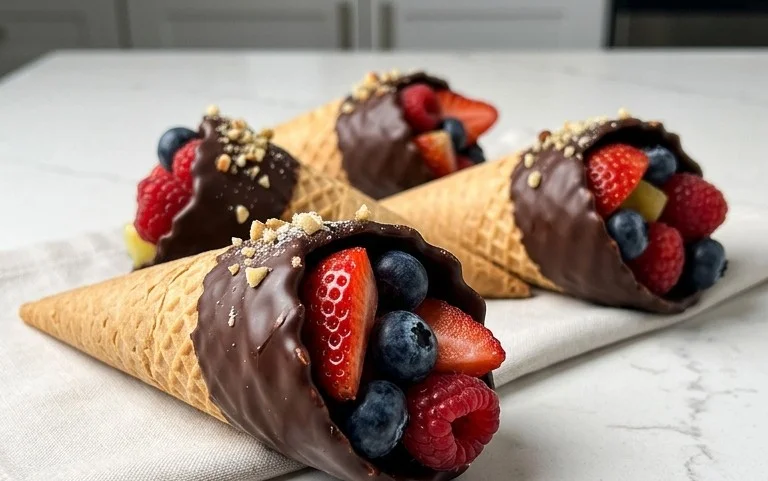
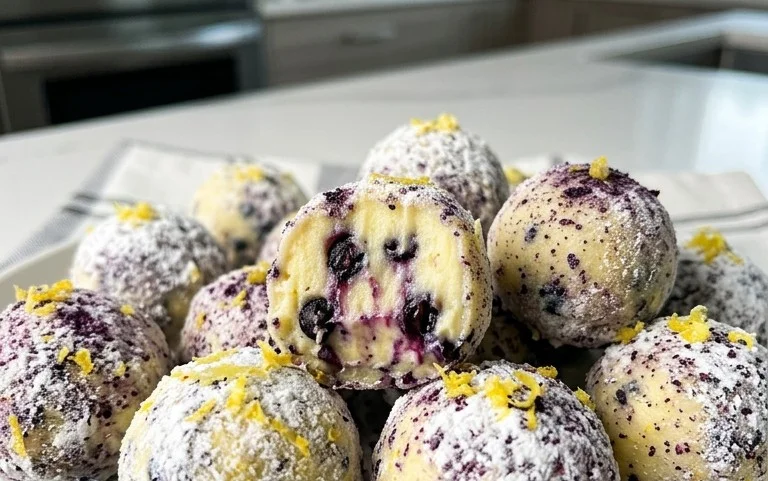
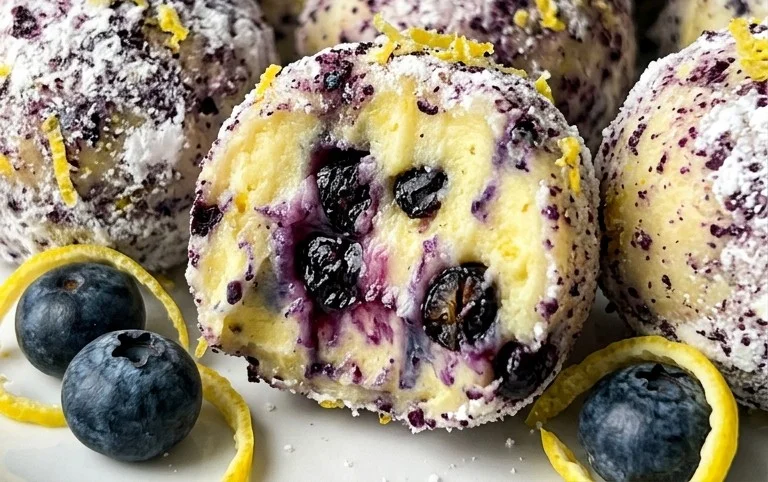
Lemon Blueberry Truffles-Easy No-Bake Treat
Lemon Blueberry Truffles: Prepare your taste buds for an explosion of sunshine and sweetness! If you’re anything like me, the combination of bright, zesty lemon and plump, juicy blueberries is pure bliss. That’s exactly the magic we’re capturing in these delightful Lemon Blueberry Truffles. These aren’t just any truffles; they’re a sophisticated yet incredibly easy-to-make treat that will impress your friends and family, or simply be a luxurious indulgence for yourself. Imagin extracte small, perfectly formed spheres bursting with the tangy zing of fresh lemon and the sweet, slightly tart burst of blueberries, all enveloped in a creamy, melt-in-your-mouth coating. They’re the perfect bite-sized escape, offering a delightful balance of flavors that feels both refreshing and decadent. Let’s dive in and create some edible sunshine!
Why You’ll Love These Lemon Blueberry Truffles
A Taste of Summer in Every Bite
Lemon Blueberry Truffles
These Lemon Blueberry Truffles are a delightful treat that perfectly balances the sweetness of blueberries with the bright zest of lemon. They’re naturally sweetened, packed with wholesome ingredients, and incredibly easy to make. Forget those store-bought confections filled with artificial flavors and refined sugars; these homemade gems are a guilt-free indulgence that you can feel good about sharing with loved ones. I love making these for afternoon pick-me-ups or as a healthy dessert option after a meal. The vibrant colors alone are enough to brighten your day!
Ingredients:
Raw Cake Ingredients Preparation:
Before we dive into rolling these delicious treats, let’s get our raw cake base ready. This part is all about combining the foundational flavors and textures that will form the heart of our truffles.
1. Process the Dry Ingredients: In a food processor, add the walnuts, dates, gluten-free rolled oats, shredded coconut, and chia seeds. Pulse these ingredients a few times until they are roughly chopped and starting to break down. We want a slightly textured base, not a fine powder. Think of it as creating a crum extractble that will bind together.
2. Add the Blueberries and Lemon: Now, add the wild blueberries and the juice of one lemon to the food processor. Continue processing until the mixture starts to clump together. It should be moist enough to hold its shape when squeezed, but not sticky or wet. If it seems a little too dry and isn’t coming together, you can add another tablespoon of lemon juice or even a tiny splash of water, but be careful not to overdo it. The dates provide natural sweetness, and the lemon juice cuts through that sweetness with a lovely tartness. The walnuts add healthy fats and a satisfying crunch, while the oats and chia seeds act as binders and boost the nutritional profile. The shredded coconut adds a subtle tropical note that complements the other flavors beautifully.
3. Chill the Mixture: Once you’ve achieved the right consistency, scrape the mixture into a bowl and cover it. Place it in the refrigerator for at least 30 minutes. This chilling step is crucial as it allows the flavors to meld and the mixture to firm up, making it much easier to roll into balls. Don’t skip this!
Frosting Preparation:
While the raw cake mixture is chilling, let’s prepare the creamy, dreamy frosting that will coat our truffles. This frosting is incredibly decadent yet made with simple, healthy ingredients.
1. Blend the Cashews: Drain and rinse the soaked cashews. Add them to a high-speed blender or a powerful food processor. Add the melted and cooled coconut oil, raw honey, vanilla extract, and the juice of the second lemon.
2. Achieve Smoothness: Begin extract blending, starting on a low speed and gradually increasing. You’ll need to scrape down the sides of the blender a few times to ensure everything is incorporated. If the mixture is too thick to blend smoothly, add the warm water, one tablespoon at a time, until you reach a thick, creamy, and spreadable consistency. It should be like a thick ganache. The cashews provide an incredibly rich and creamy base without any dairy, while the coconut oil helps the frosting set and gives it a lovely sheen. The raw honey adds natural sweetness and depth of flavor, and the vanilla extract enhances all the other notes. That second hit of lemon juice in the frosting provides an extra burst of citrus that ties everything together.
Assembling the Lemon Blueberry Truffles:
Now for the fun part – rolling and coating!
1. Roll the Truffles: Once the raw cake mixture has chilled sufficiently, take it out of the refrigerator. Using a tablespoon or a small cookie scoop, scoop out portions of the mixture. Roll each portion between your palms to form small, bite-sized balls, about 1 inch in diameter. If the mixture becomes too warm and sticky as you work, pop it back in the fridge for a few minutes.
2. Coat the Truffles: Place the rolled truffle balls on a parchment-lined baking sheet. Once all the balls are rolled, take the frosting out of the refrigerator. It should have thickened slightly. You can either dip each truffle into the frosting using a fork or a toothpick, or you can spoon the frosting over them, ensuring they are fully coated. For a more decorative finish, you can even drizzle the frosting over the balls.
3. Chill to Set: Place the coated truffles back onto the parchment-lined baking sheet and return them to the refrigerator. Allow them to chill for at least 1 hour, or until the frosting has set firmly. This is important for the truffles to hold their shape and for the frosting to develop that delightful truffle texture.
Once they’re set, these Lemon Blueberry Truffles are ready to be enjoyed! Store them in an airtight container in the refrigerator for up to a week. They are a perfect make-ahead treat for parties, a thoughtful homemade gift, or simply a delicious way to satisfy your sweet cravings. Enjoy every zesty, fruity bite!
Conclusion:
There you have it! These Lemon Blueberry Truffles are an absolute triumph of flavor and simplicity. The bright, zesty notes of lemon perfectly complement the sweet burst of blueberries, all enveloped in a creamy, decadent truffle. They’re incredibly easy to make, making them ideal for both seasoned bakers and kitchen newcomers. The beautiful contrast of colors and the delightful texture make these treats a showstopper for any occasion, whether it’s a special celebration, a thoughtful homemade gift, or just a well-deserved indulgence for yourself. I truly encourage you to give these Lemon Blueberry Truffles a try – you won’t be disappointed!
Feel free to get creative with serving suggestions! They are fantastic on their own as a sweet ending to a meal. You can also arrange them on a dessert platter alongside other small bites, perhaps some shortbread cookies or fresh fruit. For an extra touch, dust them with a little powdered sugar or a fine drizzle of white chocolate before serving.
Thinking about variations? You could swap the blueberries for raspberries for a different berry profile, or add a hint of lavender for a more sophisticated floral note. A sprinkle of lemon zest mixed into the coating can also amp up the citrus punch!
Frequently Asked Questions:
How should I store my Lemon Blueberry Truffles?
For the best flavor and texture, store your Lemon Blueberry Truffles in an airtight container in the refrigerator for up to a week. If you plan to keep them longer, you can freeze them for up to a month. Thaw them in the refrigerator before enjoying.
Can I make these truffles vegan?
Absolutely! You can easily make these Lemon Blueberry Truffles vegan by using dairy-free cream cheese and white chocolate chips. Ensure your other ingredients, like the butter extract (if using), are also vegan-friendly.
What is the best way to get a smooth truffle coating?
To achieve a smooth coating, ensure your truffles are well-chilled before dipping. Melt your chocolate or candy melts gently, ideally in a double boiler or in short intervals in the microwave, stirring frequently to prevent scorching. Use a fork or a dipping tool to carefully coat each truffle, allowing any excess to drip off before placing it on parchment paper to set.
Lemon Blueberry Truffles
Refreshing and naturally sweet no-bake vegan truffles bursting with lemon and blueberry flavor, made with wholesome ingredients.
Ingredients
-
1 cup wild blueberries
-
1 cup walnuts
-
1 cup dates
-
3 tbsp gluten-free rolled oats
-
2 tbsp shredded coconut
-
1 tbsp chia seeds
-
1 lemon, juiced
-
1 cup cashews
-
½ cup coconut oil, melted and cooled
-
3 tbsp raw honey
-
1 tsp vanilla extract
-
2-3 tbsp warm water
Instructions
-
Step 1
In a food processor, combine walnuts, dates, gluten-free rolled oats, shredded coconut, and chia seeds. Pulse until a coarse meal forms. -
Step 2
Add the wild blueberries and lemon juice to the food processor. Process until the mixture starts to clump together and can be formed into balls. -
Step 3
Roll the mixture into small truffle-sized balls and place them on a parchment-lined baking sheet. -
Step 4
For the frosting, combine soaked cashews, melted coconut oil, raw honey, vanilla extract, and lemon juice in a high-speed blender. Blend until very smooth, adding warm water a tablespoon at a time if needed to achieve a creamy consistency. -
Step 5
Dip each truffle into the cashew frosting, ensuring it is fully coated. Return to the parchment-lined sheet. -
Step 6
Freeze the truffles for at least 30 minutes to allow the frosting to set. Store in the refrigerator or freezer.
Important Information
Nutrition Facts (Per Serving)
It is important to consider this information as approximate and not to use it as definitive health advice.
Allergy Information
Please check ingredients for potential allergens and consult a health professional if in doubt.